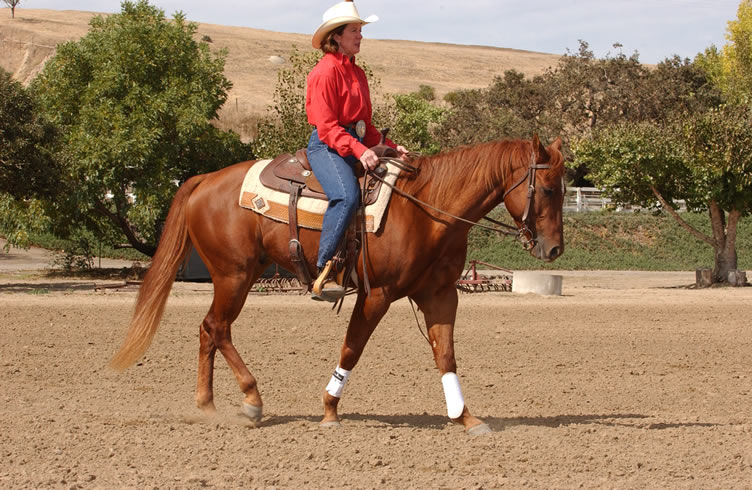
Softening the Face: Reining Essential #1
by Sandy | Aug 16, 2018 | Reining |
There are a few things every horse should be able to do before going on to specialize in any discipline. These are the things we “put on” a colt in the first 60 to 90 days of his training; they’re also what we use to tune up an older horse or “fix” a problem horse. They are the foundation for all that we do.
I call them the Seven Essentials. They are:
1. softening the face;
2. walking a circle;
3. walking a counter-arc circle;
4. backing up;
5. responding to “whoa”;
6. moving off your leg
7. pivoting on the hind end
They sound very simple, and they are. Perfecting them can be another story though!
My philosophy of progress by tiny increments (remember—as little as 1 percent a day!) is critical here. Extra time spent nailing these basics will pay you terrific dividends as you move forward. So, go slow; tackle them in this order, and take the time it takes to get them right.
Reining Essential #1: Softening the Face
“Softening the face” means softening in the jaw and flexing willingly at the poll in response to light pressure on both reins, and flexing to the left or right in response to left- or right-rein pressure. It’s the single most important thing to teach your horse.
Why? Because it’s how you and your horse both know that you are in control. By softening through the jaw and flexing at the poll, your horse says, “I’m yours. What do you want me to do?” If, on the other hand, he even thinks that “putting his head on upside down” (that is, lifting his head and bracing with his neck) is an option, then you don’t have control of his mind or his body. And that can be downright scary on a thousand-pound animal!
Just as the Seven Essentials are the key to all reining maneuvers, giving the face is the key to the rest of the
Seven Essentials. That’s why it’s where we begin. I’ll start by describing exactly what you’re striving for.
The goal. Ultimately, your horse should stay soft and flexed in response to your picking up the rein, so that his face is essentially at the vertical, or more or less perpendicular to the ground. You should never feel him pulling on your hands.
Ideally, he’ll ultimately remain soft even with a little slack in the reins.
If you ask him the way I’m going to describe, using your legs to keep his hind end engaged, he should over time begin to round his topline, too, reaching far up underneath himself with his hind legs (what I call “shortening the wheelbase”). He should stay relaxed, rather than getting agitated. Eventually, you’ll feel him getting better balanced under you.
Timing is critically important. Remember, your horse learns from the release of pressure (the reward), not the application of it (the pull). Also, he assumes what he was doing immediately before a reward is what he’s being rewarded for. So to reward that very first “give,” release pressure and praise him the instant you feel him respond.
If your horse is really green, you might start from the ground facing him, and do the exercise below, before doing it when you’re on him.
With your hands about 12 to 24 inches apart, first draw back gently but firmly with both reins, drawing the bit from side to side gently if need be to get your horse to flex at the poll, drop his head, and soften. Release pressure and praise him the instant he responds (make sure he’s actually “giving” to you—softening to your hand–and not just dropping his head, or just moving it back and forth), then repeat.
To ask for the lateral flexion, slide your hand halfway down one rein, then draw your hand back in a pull-and-release motion toward your waist. Try to get your horse to volunteer that last little bit of bend, then loosen the reins and praise him. Repeat several times, then do the same exercise with the other rein.
Repeat these flexing exercises each time you mount and before you begin your riding sessions.
At a walk, trot, lope. When he’s becoming solid in his flexing at a standstill, try it at a walk using your legs to keep him moving forward.
Then, ask for flexion to the side, move him onto a small circle using your inside leg in neutral position to encourage him to bend through his body as your inside rein asks him to flex his neck to the inside. The bend in his neck should enable you just to see the corner of his eye.
When he’s responding well at a walk, try it at a trot, and then a lope, using the same approach (you’ll need slightly larger circles at the faster gaits). Remember—you’re using your legs to create impulsion up into the bridle.
Putting it all together. An exercise to combine all the learning focuses on transitions, which are a great place to work on flexion. So practice getting and keeping flexion going from a trot to a lope to a trot, then down to a walk for a step or two, then stop and back up. Strive for softness in the transitions—especially the downward ones, as from a lope to a trot and a trot to a walk. Mix it all up and do it a lot!

LET US KNOW YOUR THOUGHTS 
Your article helped me a lot, is there any more related content? Thanks!
Thanks for sharing. I read many of your blog posts, cool, your blog is very good.
Can you be more specific about the content of your article? After reading it, I still have some doubts. Hope you can help me.
Your article helped me a lot, is there any more related content? Thanks!
Thanks for sharing. I read many of your blog posts, cool, your blog is very good.
Your article helped me a lot, is there any more related content? Thanks! https://www.binance.com/el/register?ref=IQY5TET4
Thank you for helping out, great info. https://www.slmatrix.com/?q=node/22549