Essential 7 Pivoting on the Hind End

Essential 7 Pivoting on the Hind End

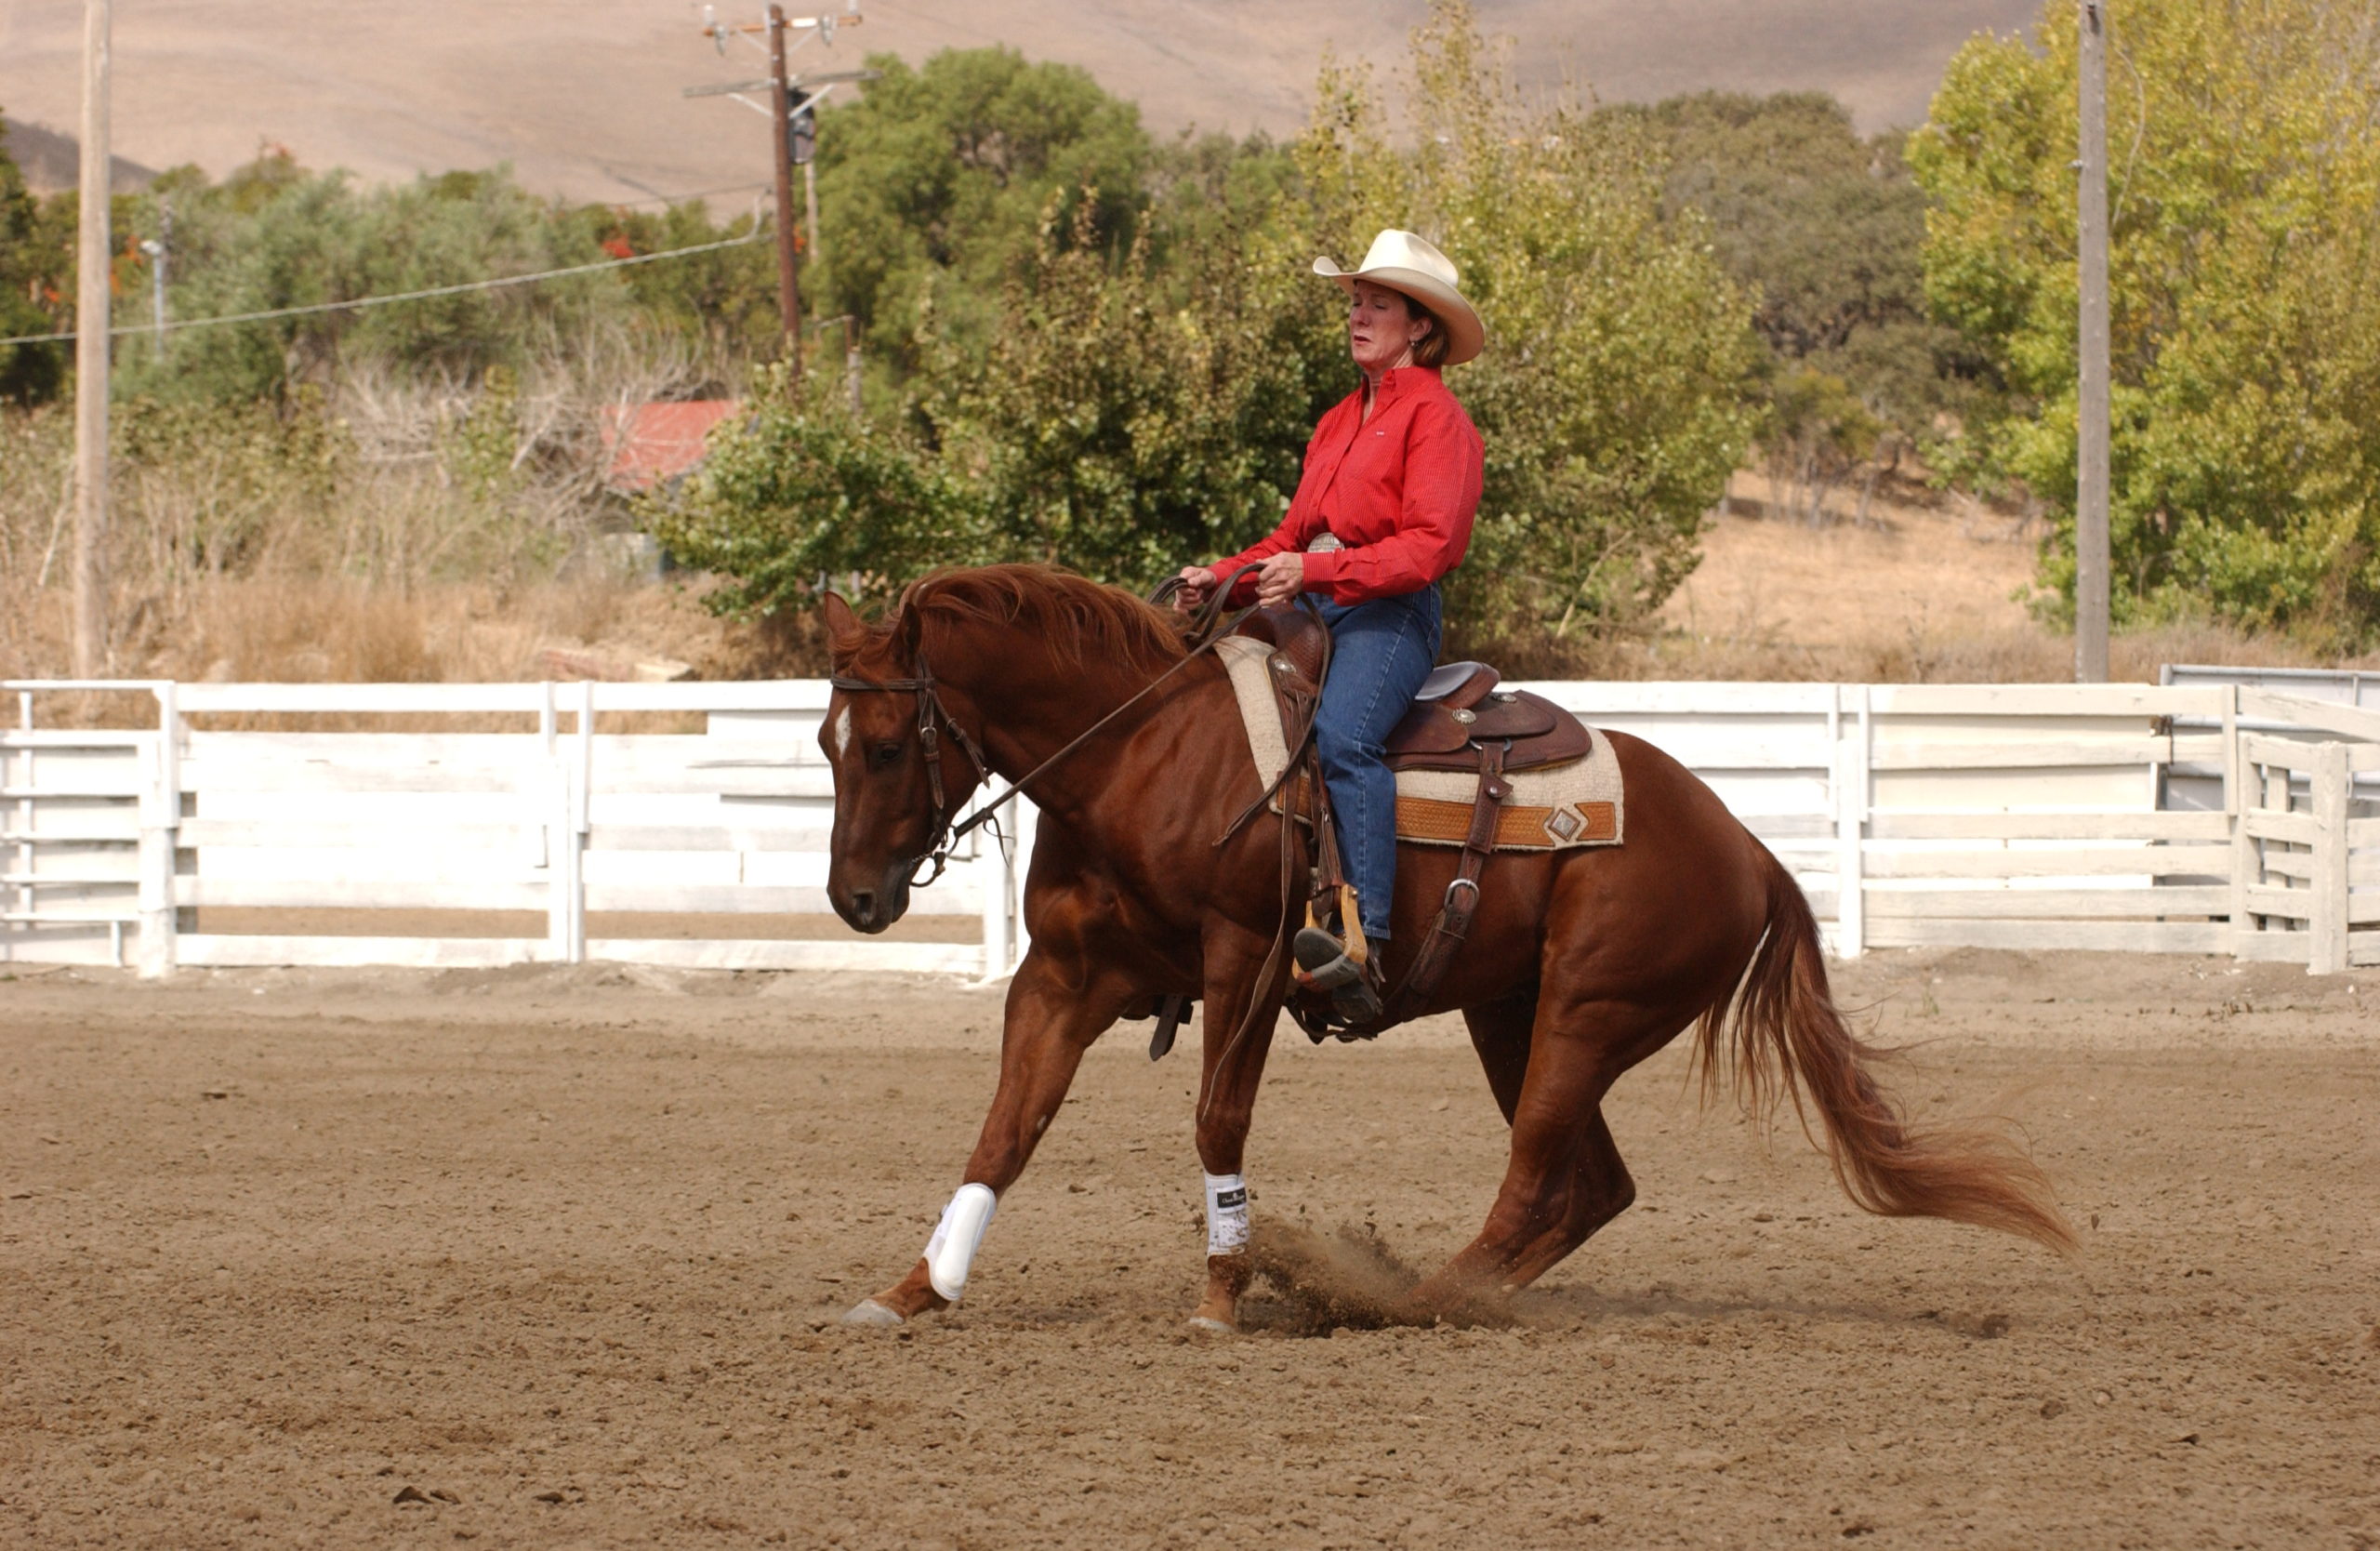
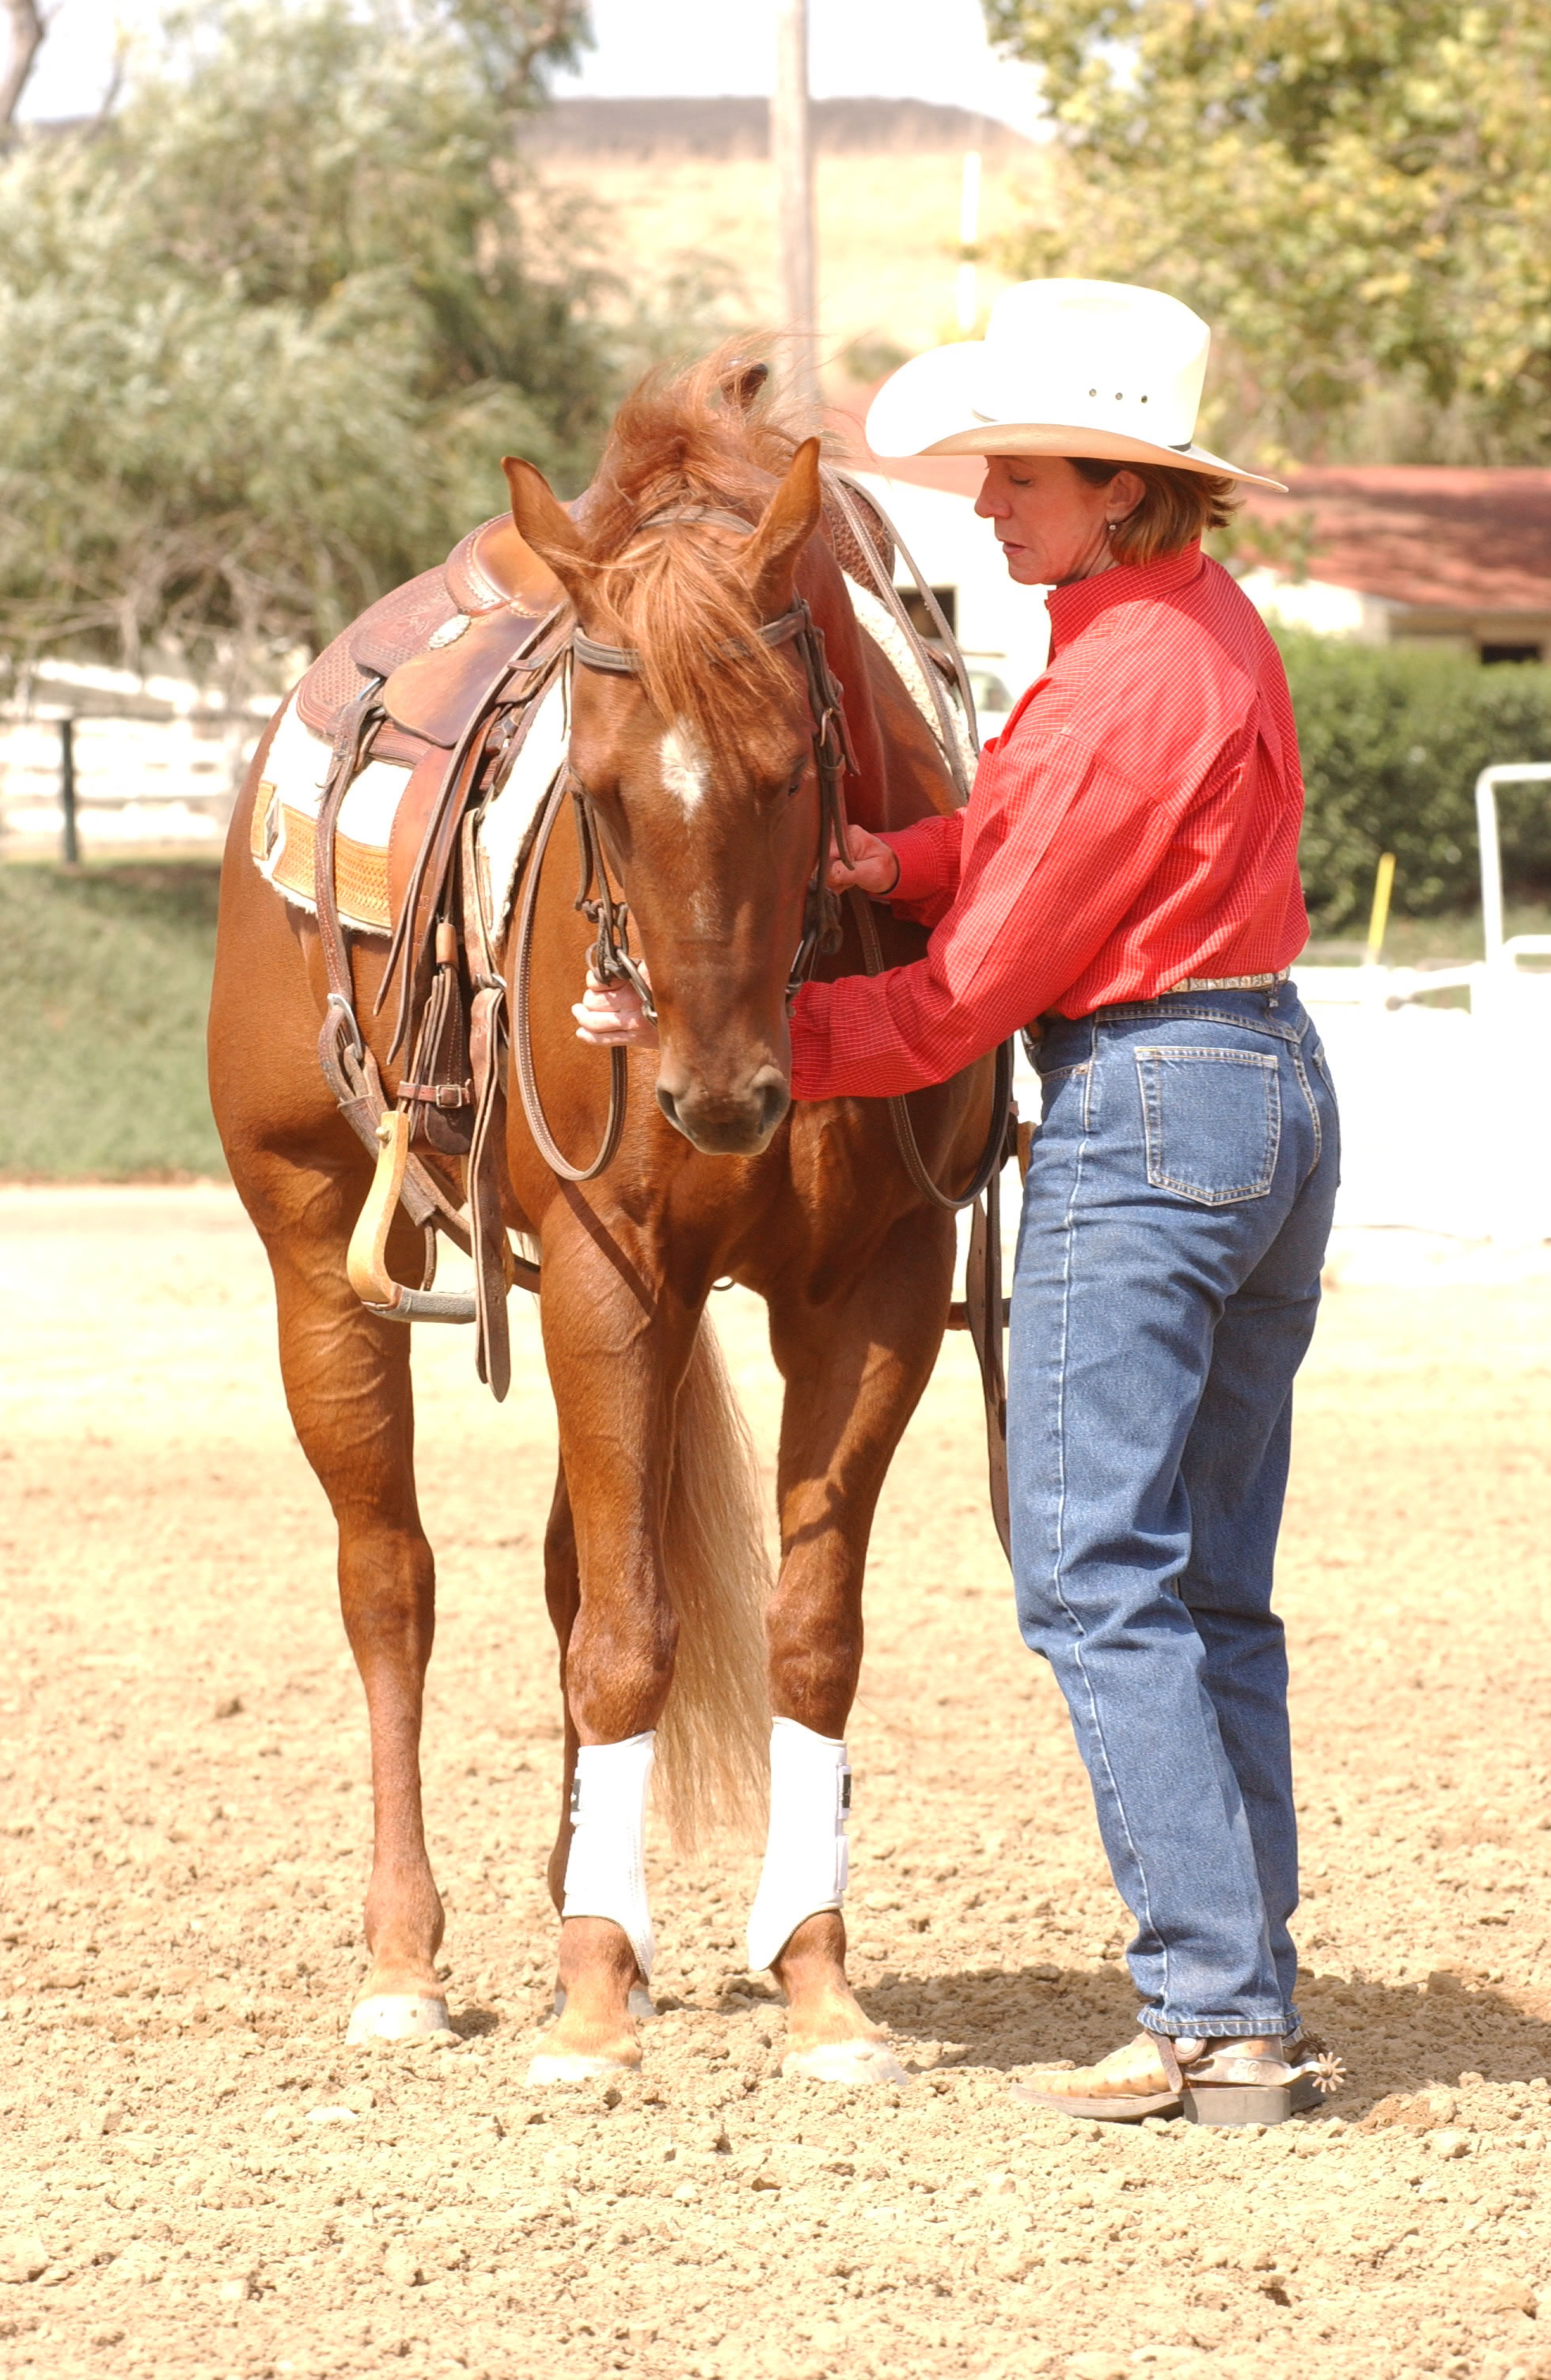
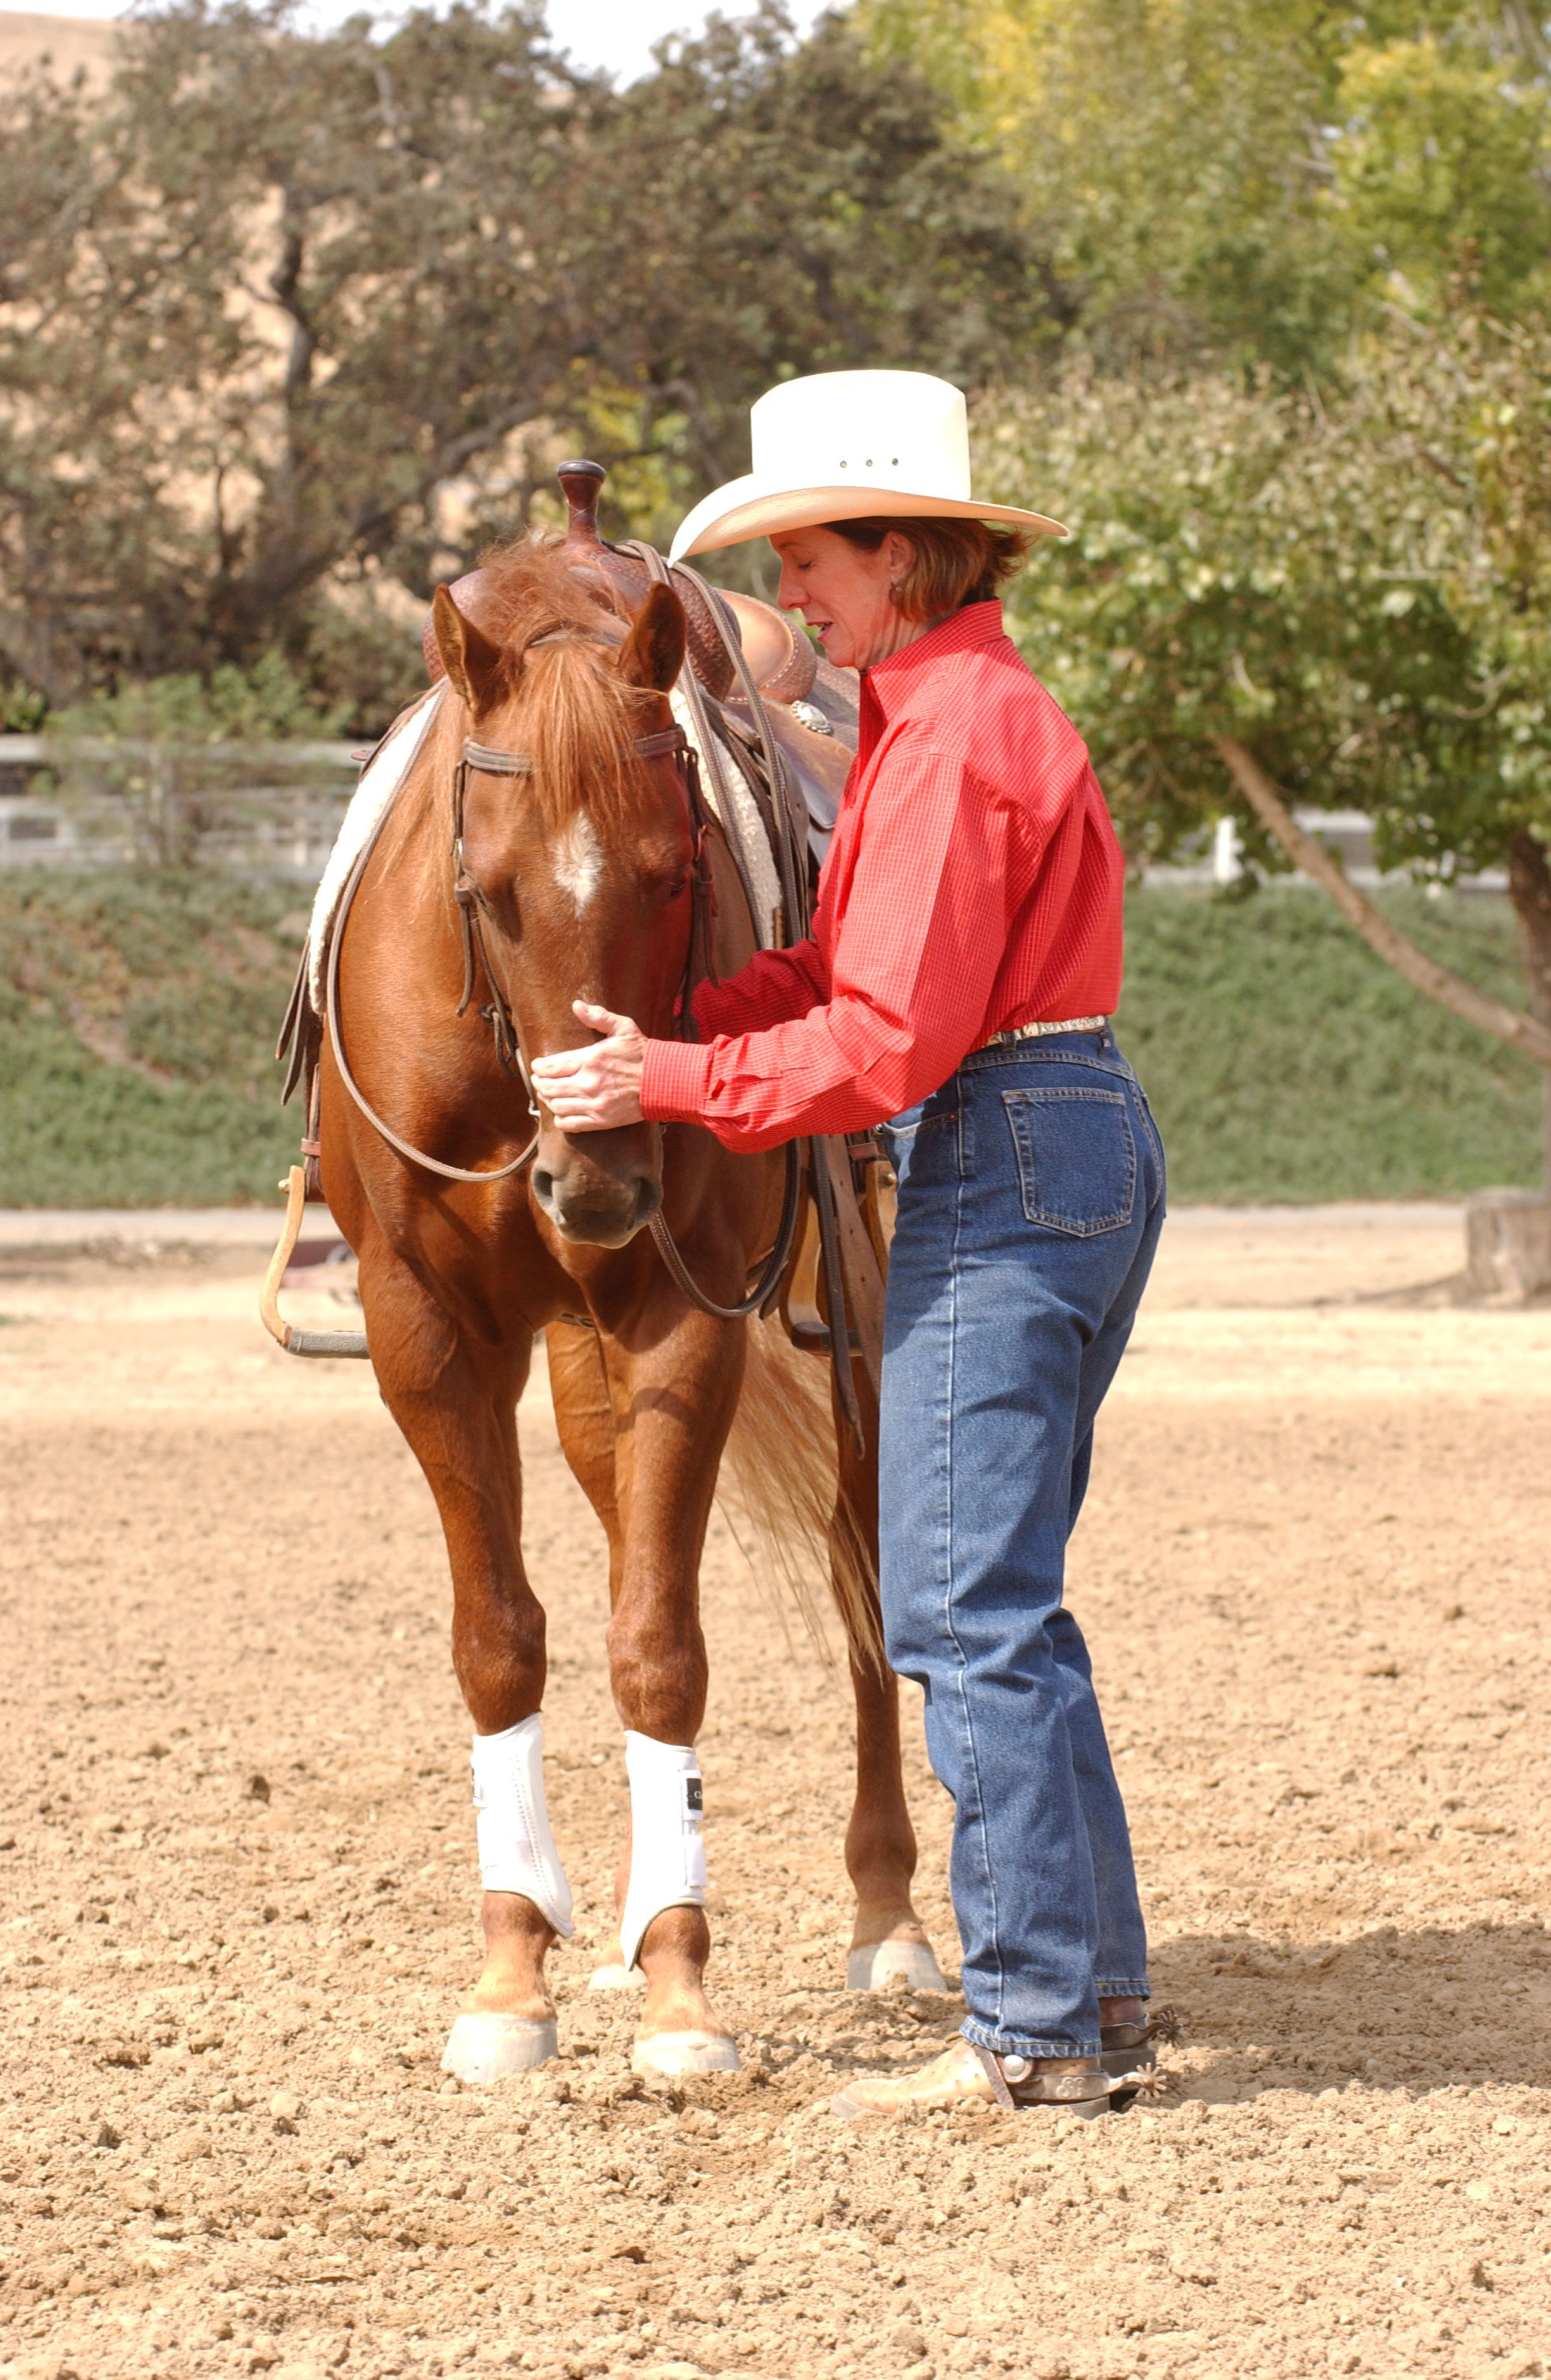
The 360-degree pivot on the hind end is the start of what will eventually be your spin, so a correct foundation is extremely important.

All major problems in the maneuver, now and later, result from lack of shoulder control.

With Essential 3 (the counter-arc circle) and Essential 6 (moving off the leg), you’ve started to gain control of your horse’s shoulder.

With this, the final Essential 7, you’ll build on that control.

A common mistake at this point is to “go faster wronger.” In other words, eagerness to move a pivot into a spin, prompts riders to sacrifice form for speed.

Don’t do it! Go as slowly as you need in order to maintain control and do it correctly.

In the beginning, think in terms of a 90-degree turn, and then a 180. Build toward the 360 in increments.

There are many different ways of teaching a horse to step his front end around; one tried-and-true method is to walk in your perfect circle, then tighten it down while taking care to keep your horse’s nose pointed in the direction of the turn.

This is the method I’ll teach you.

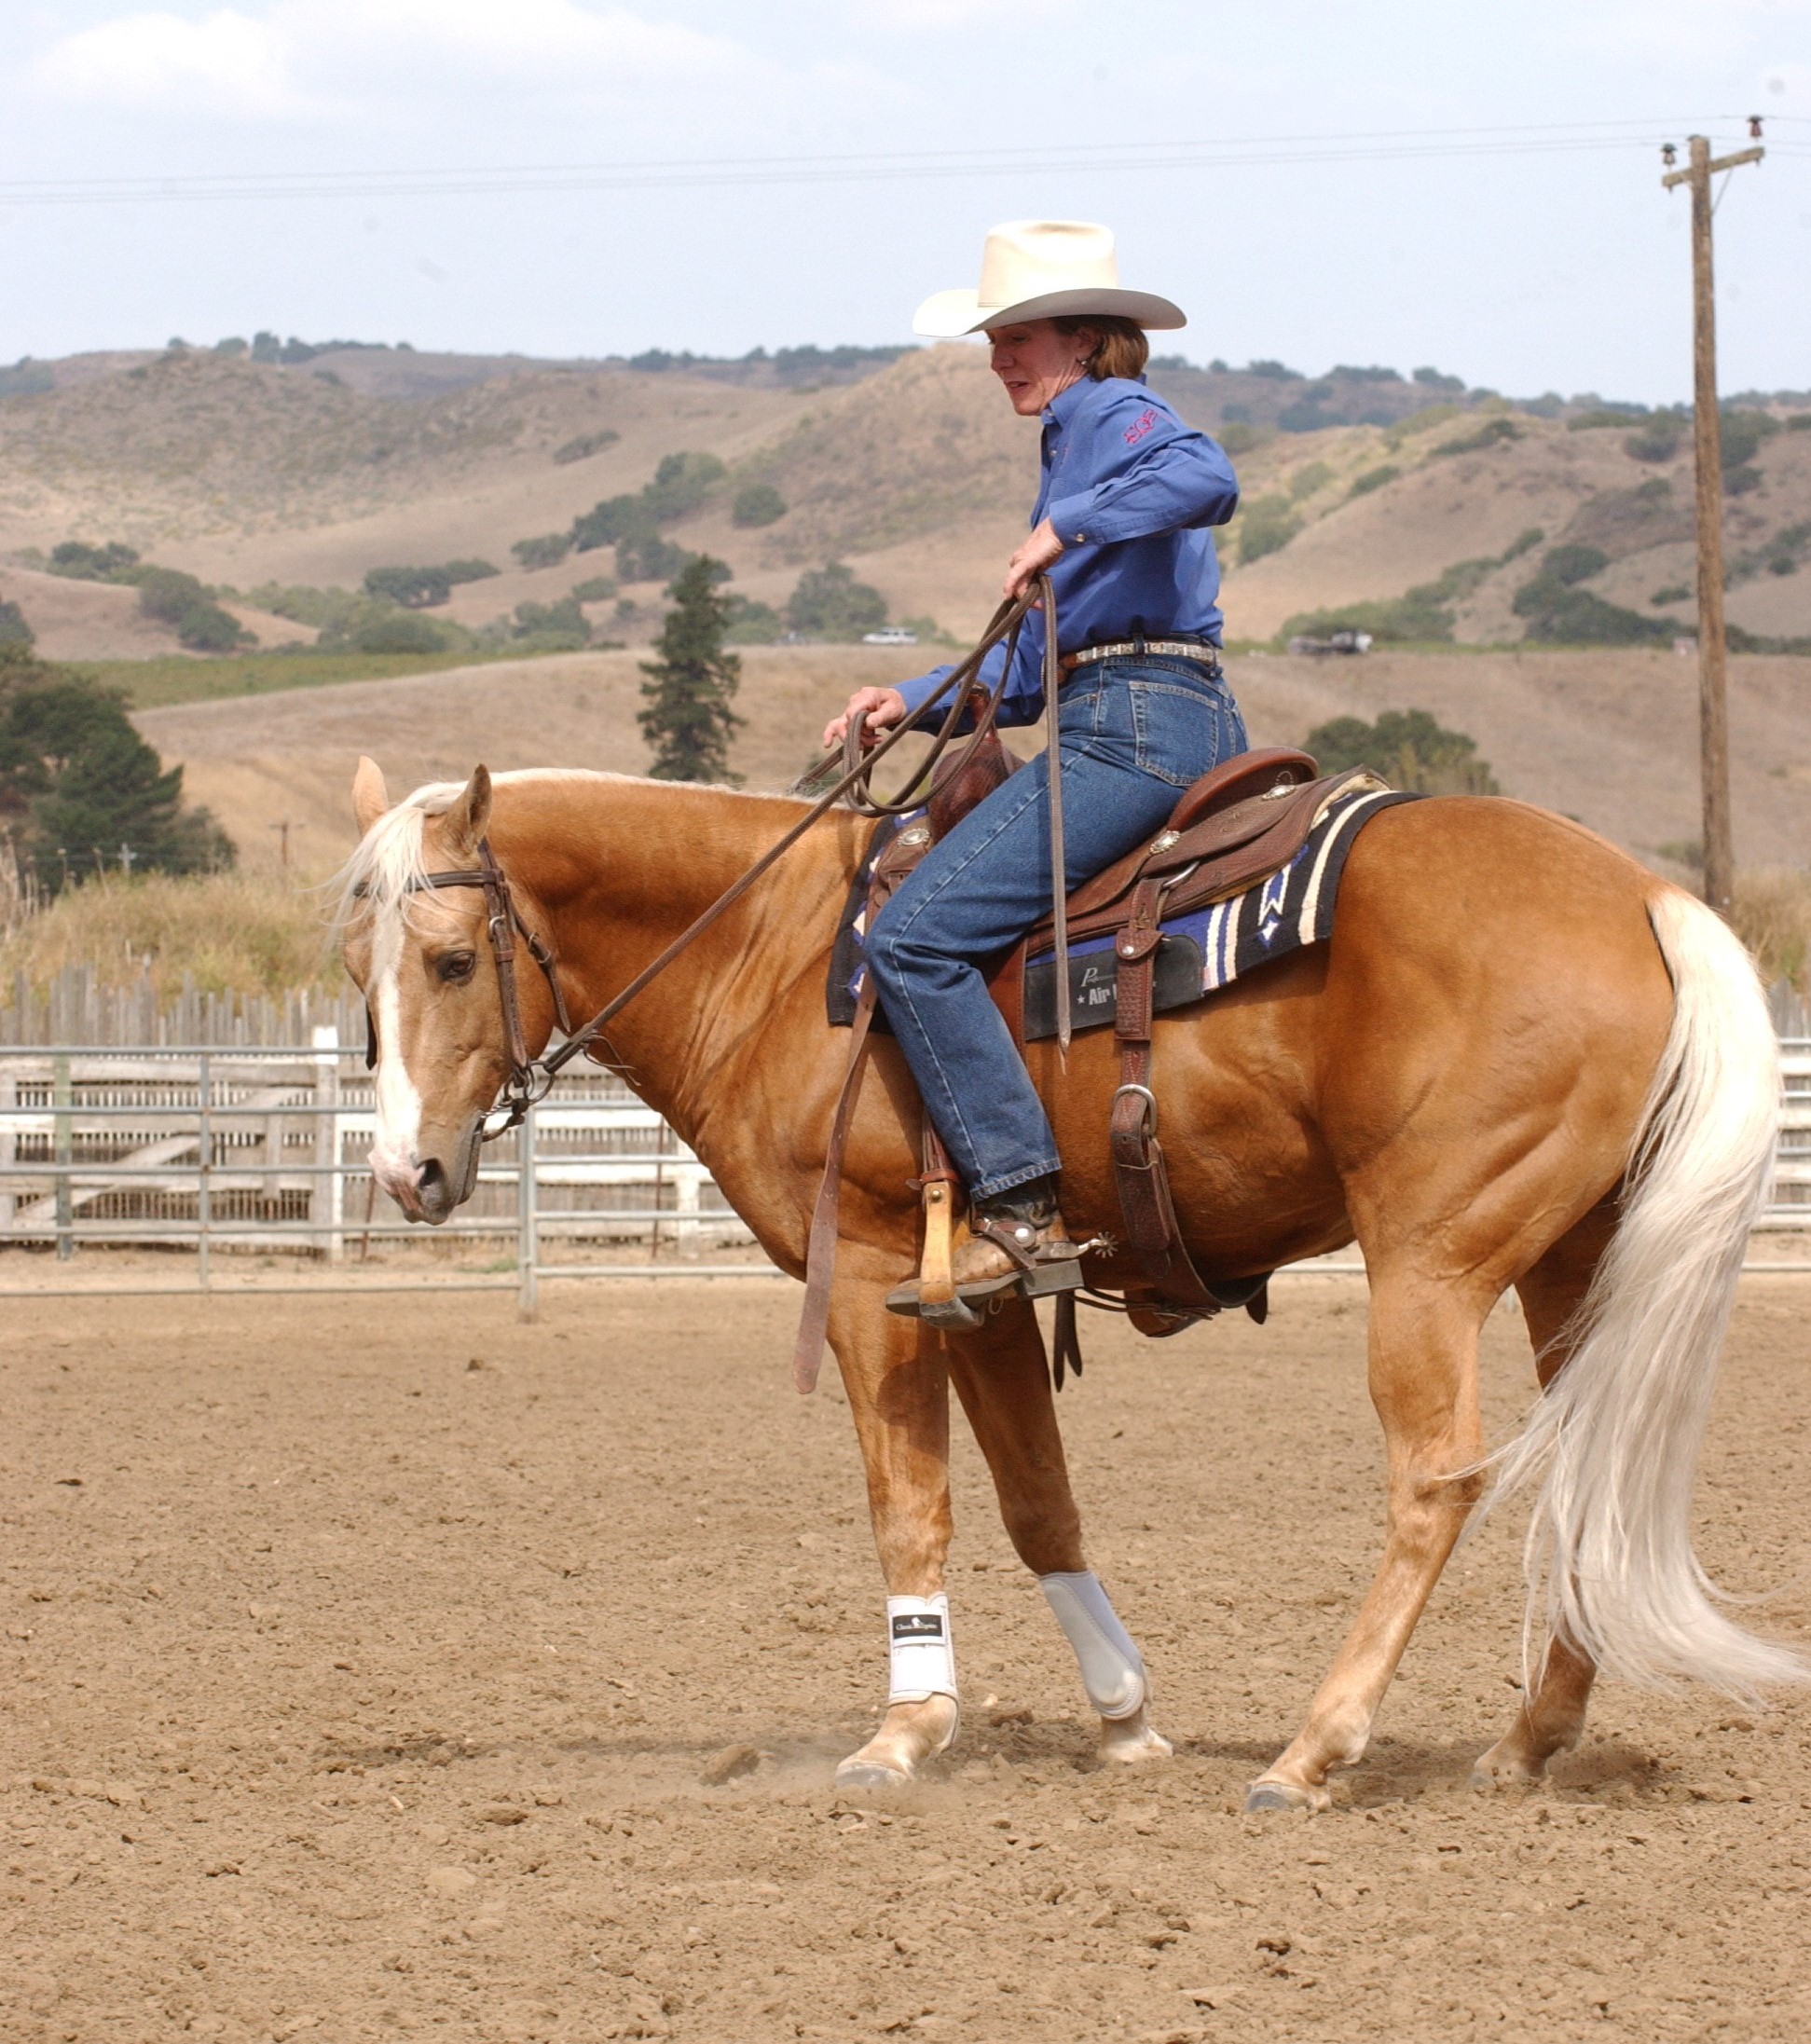
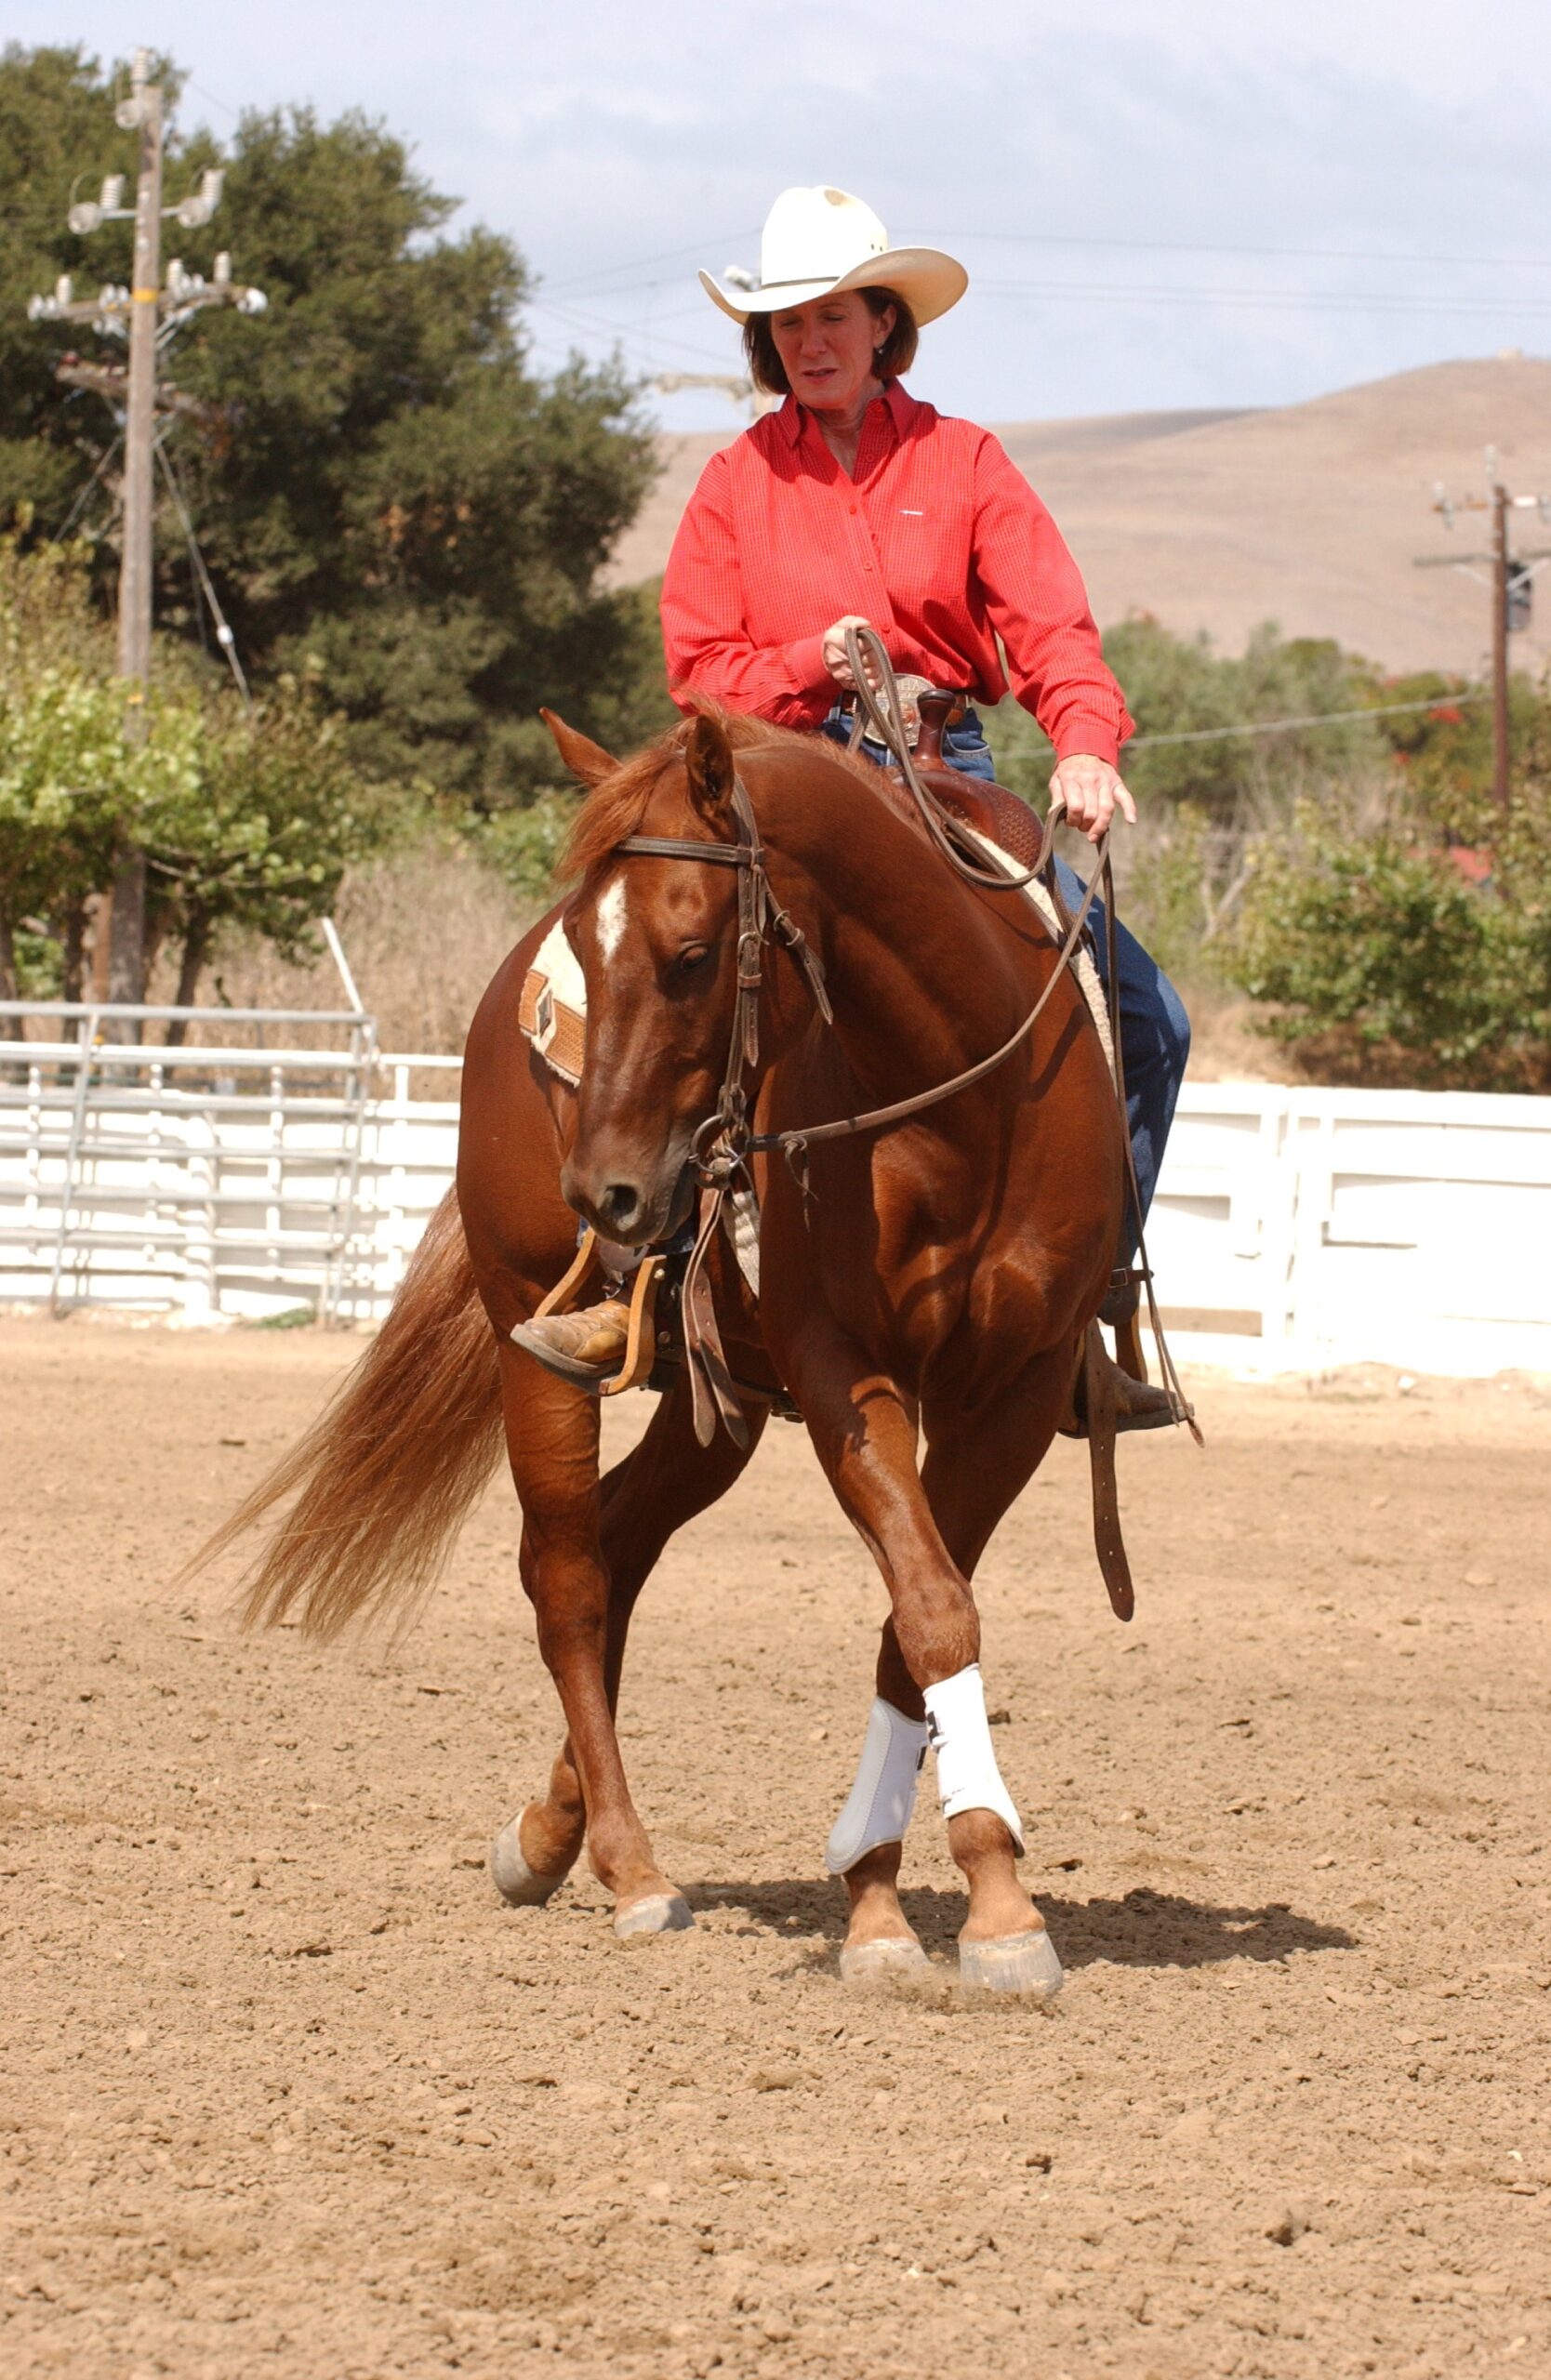
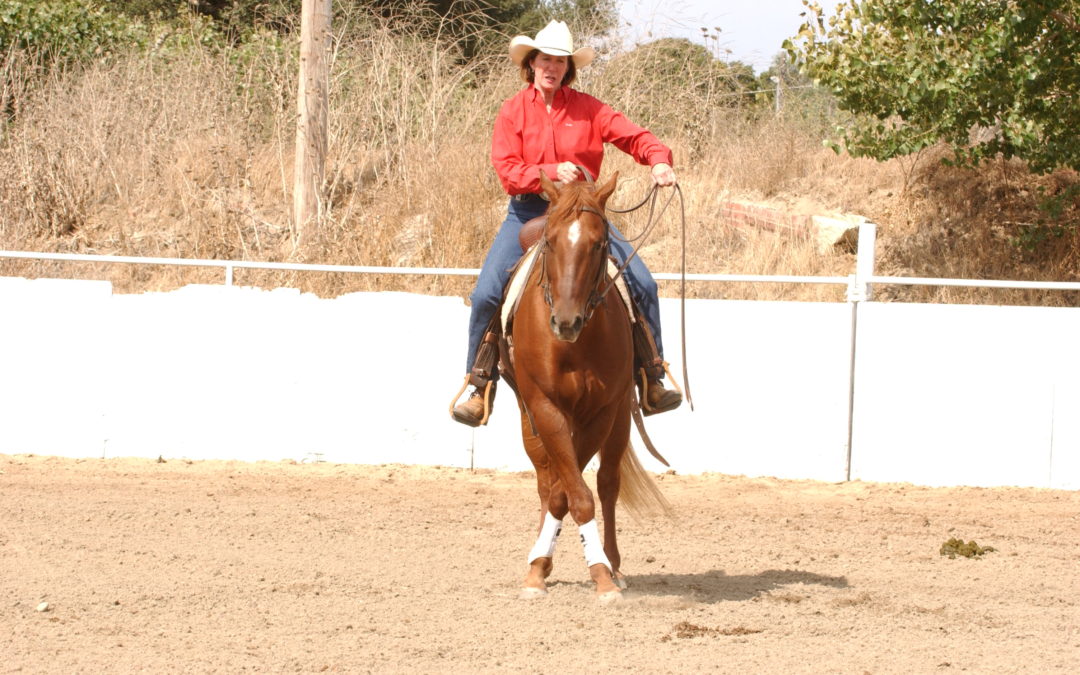
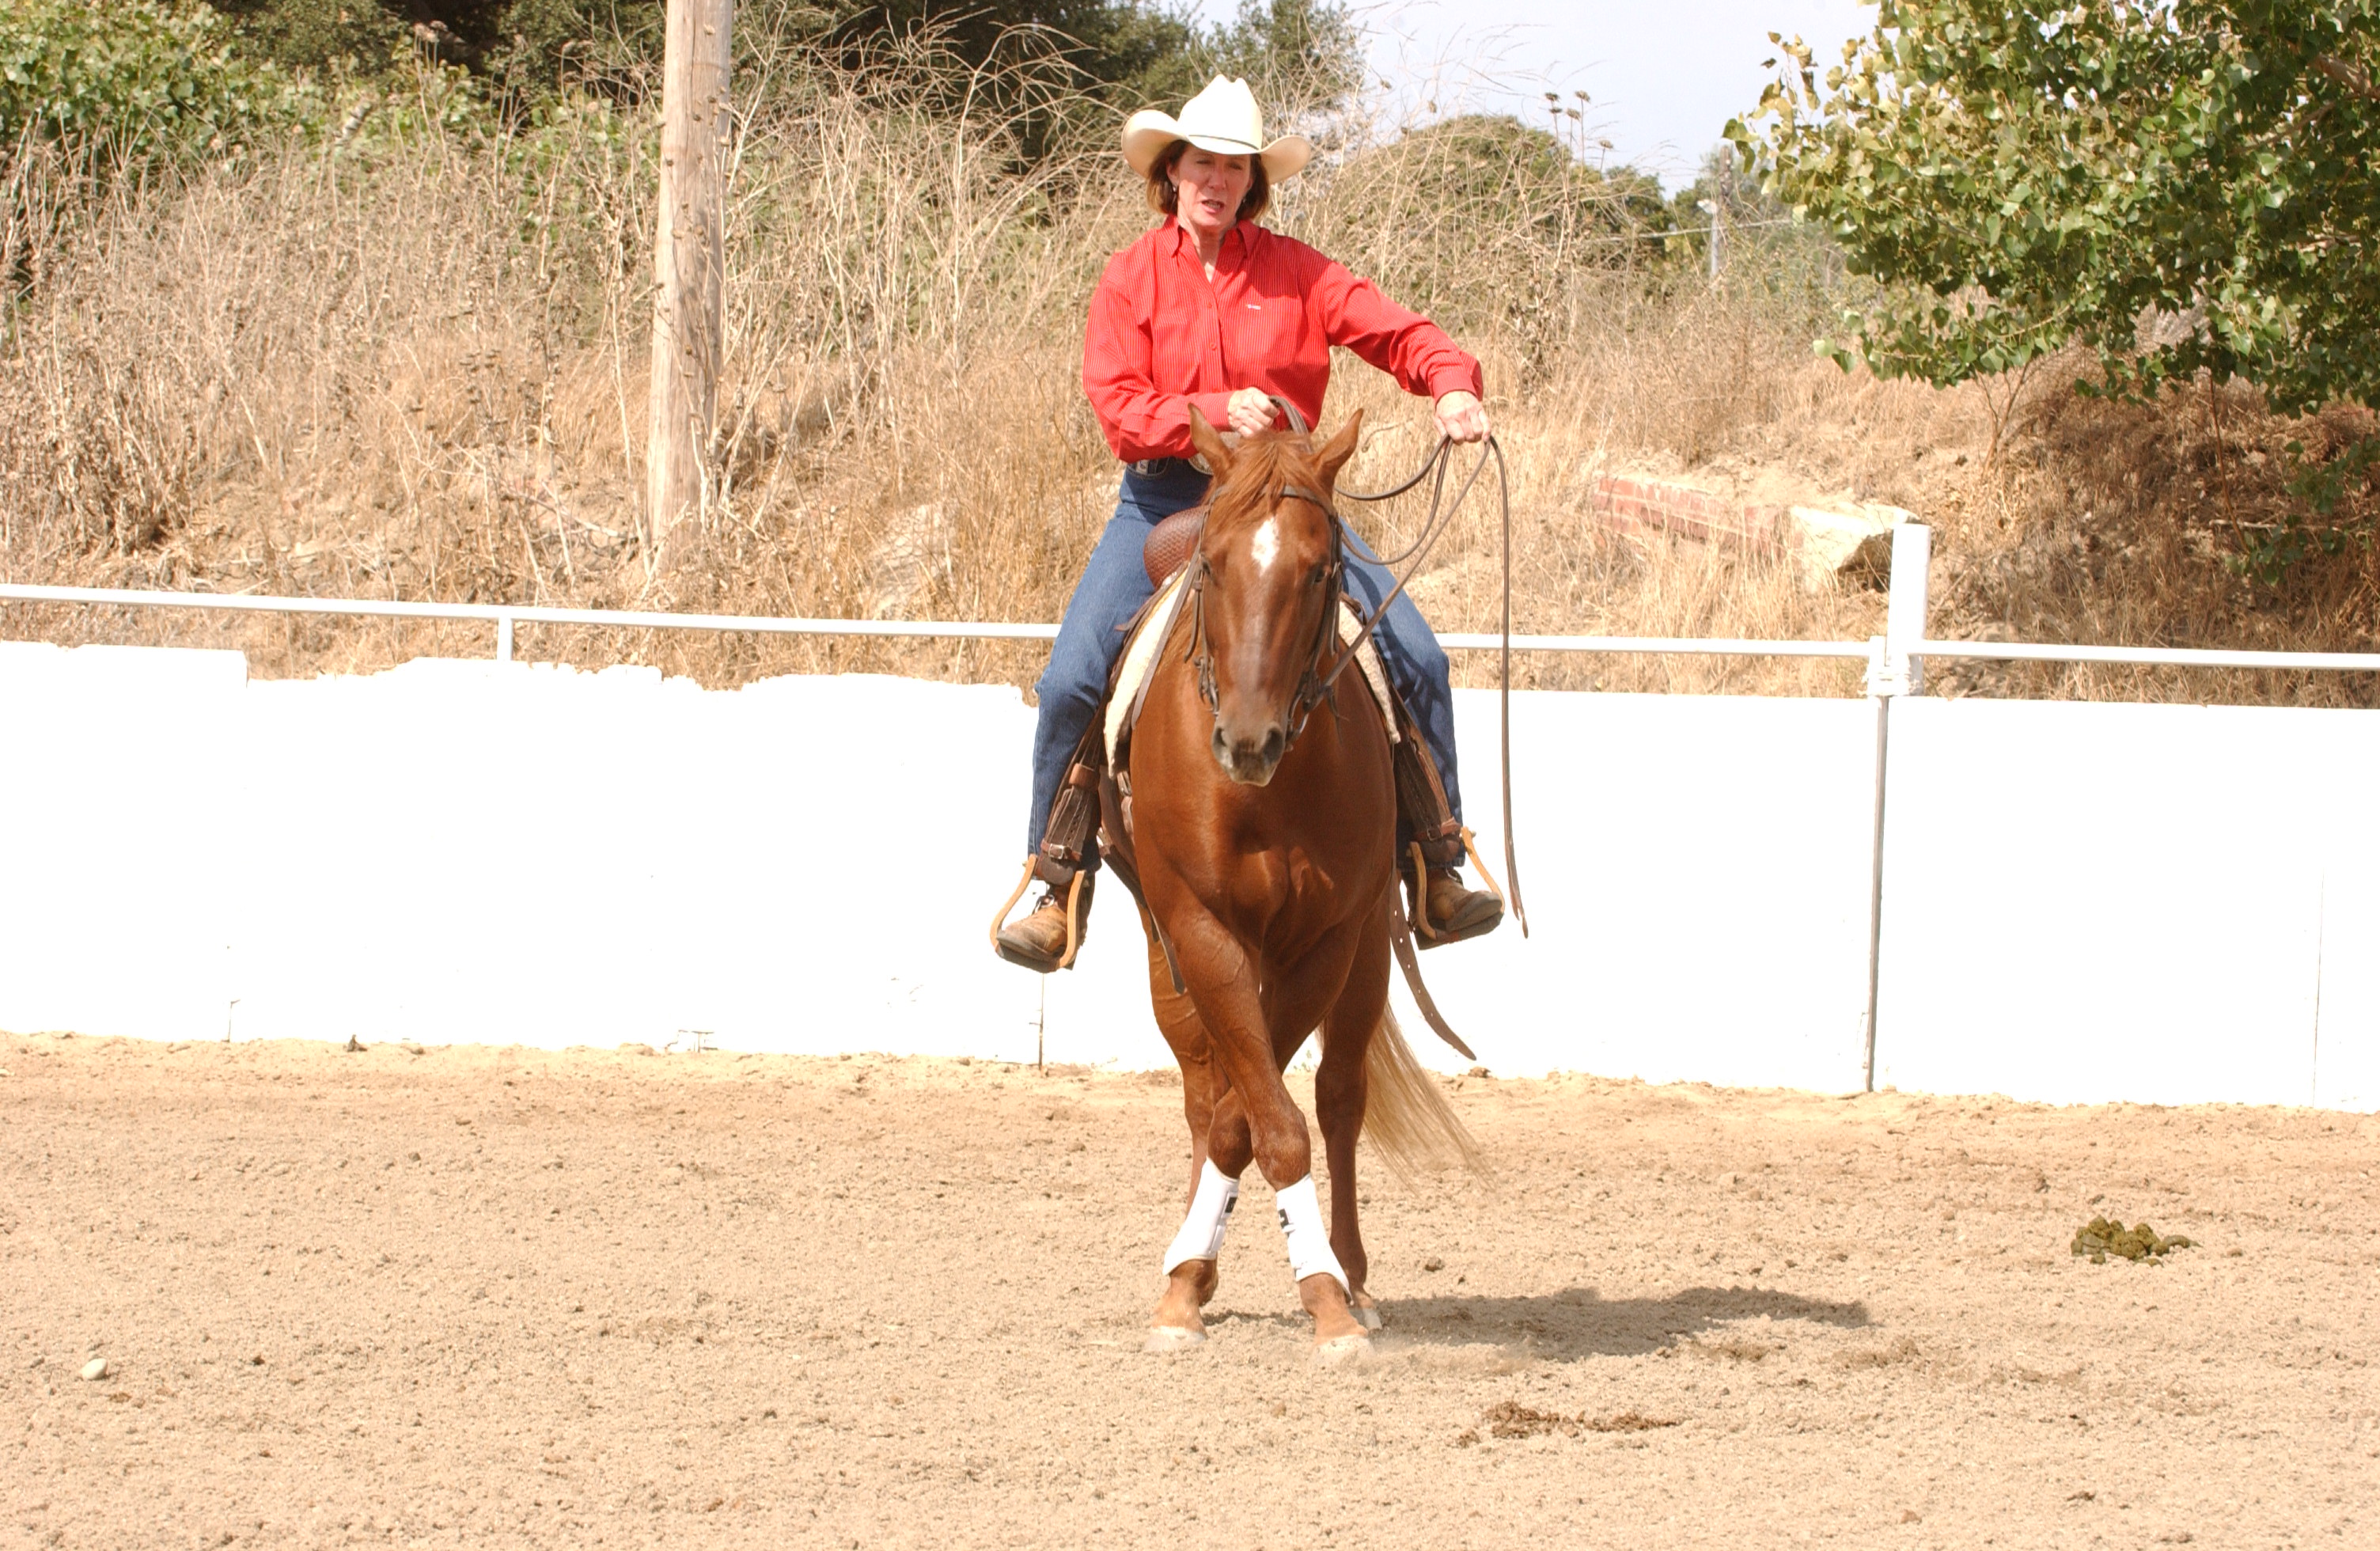
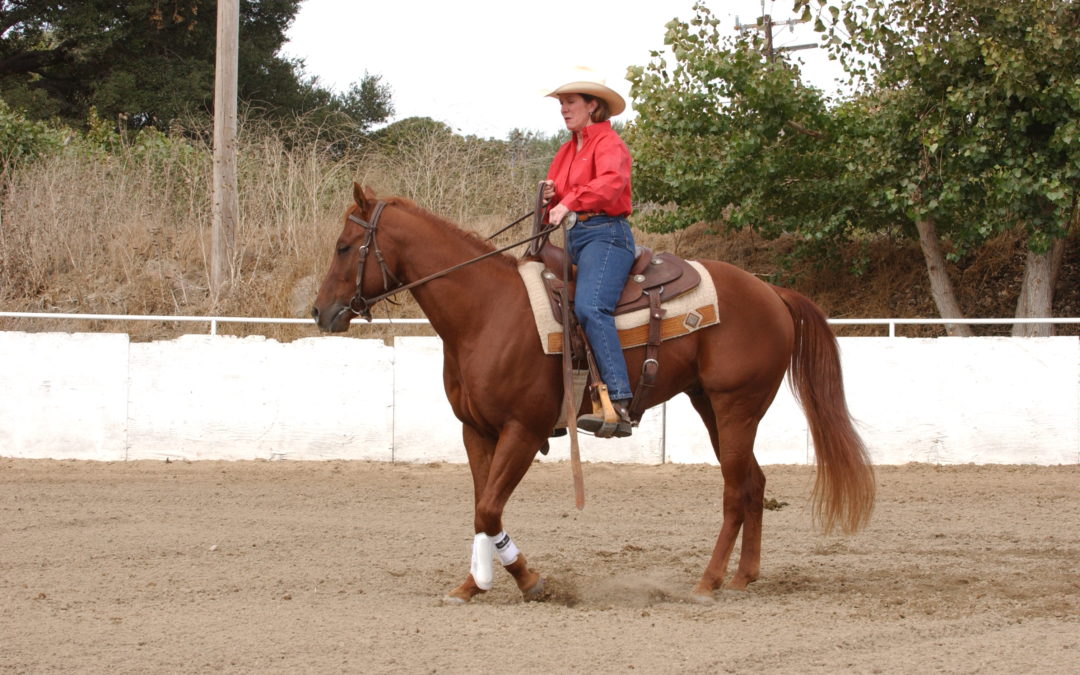
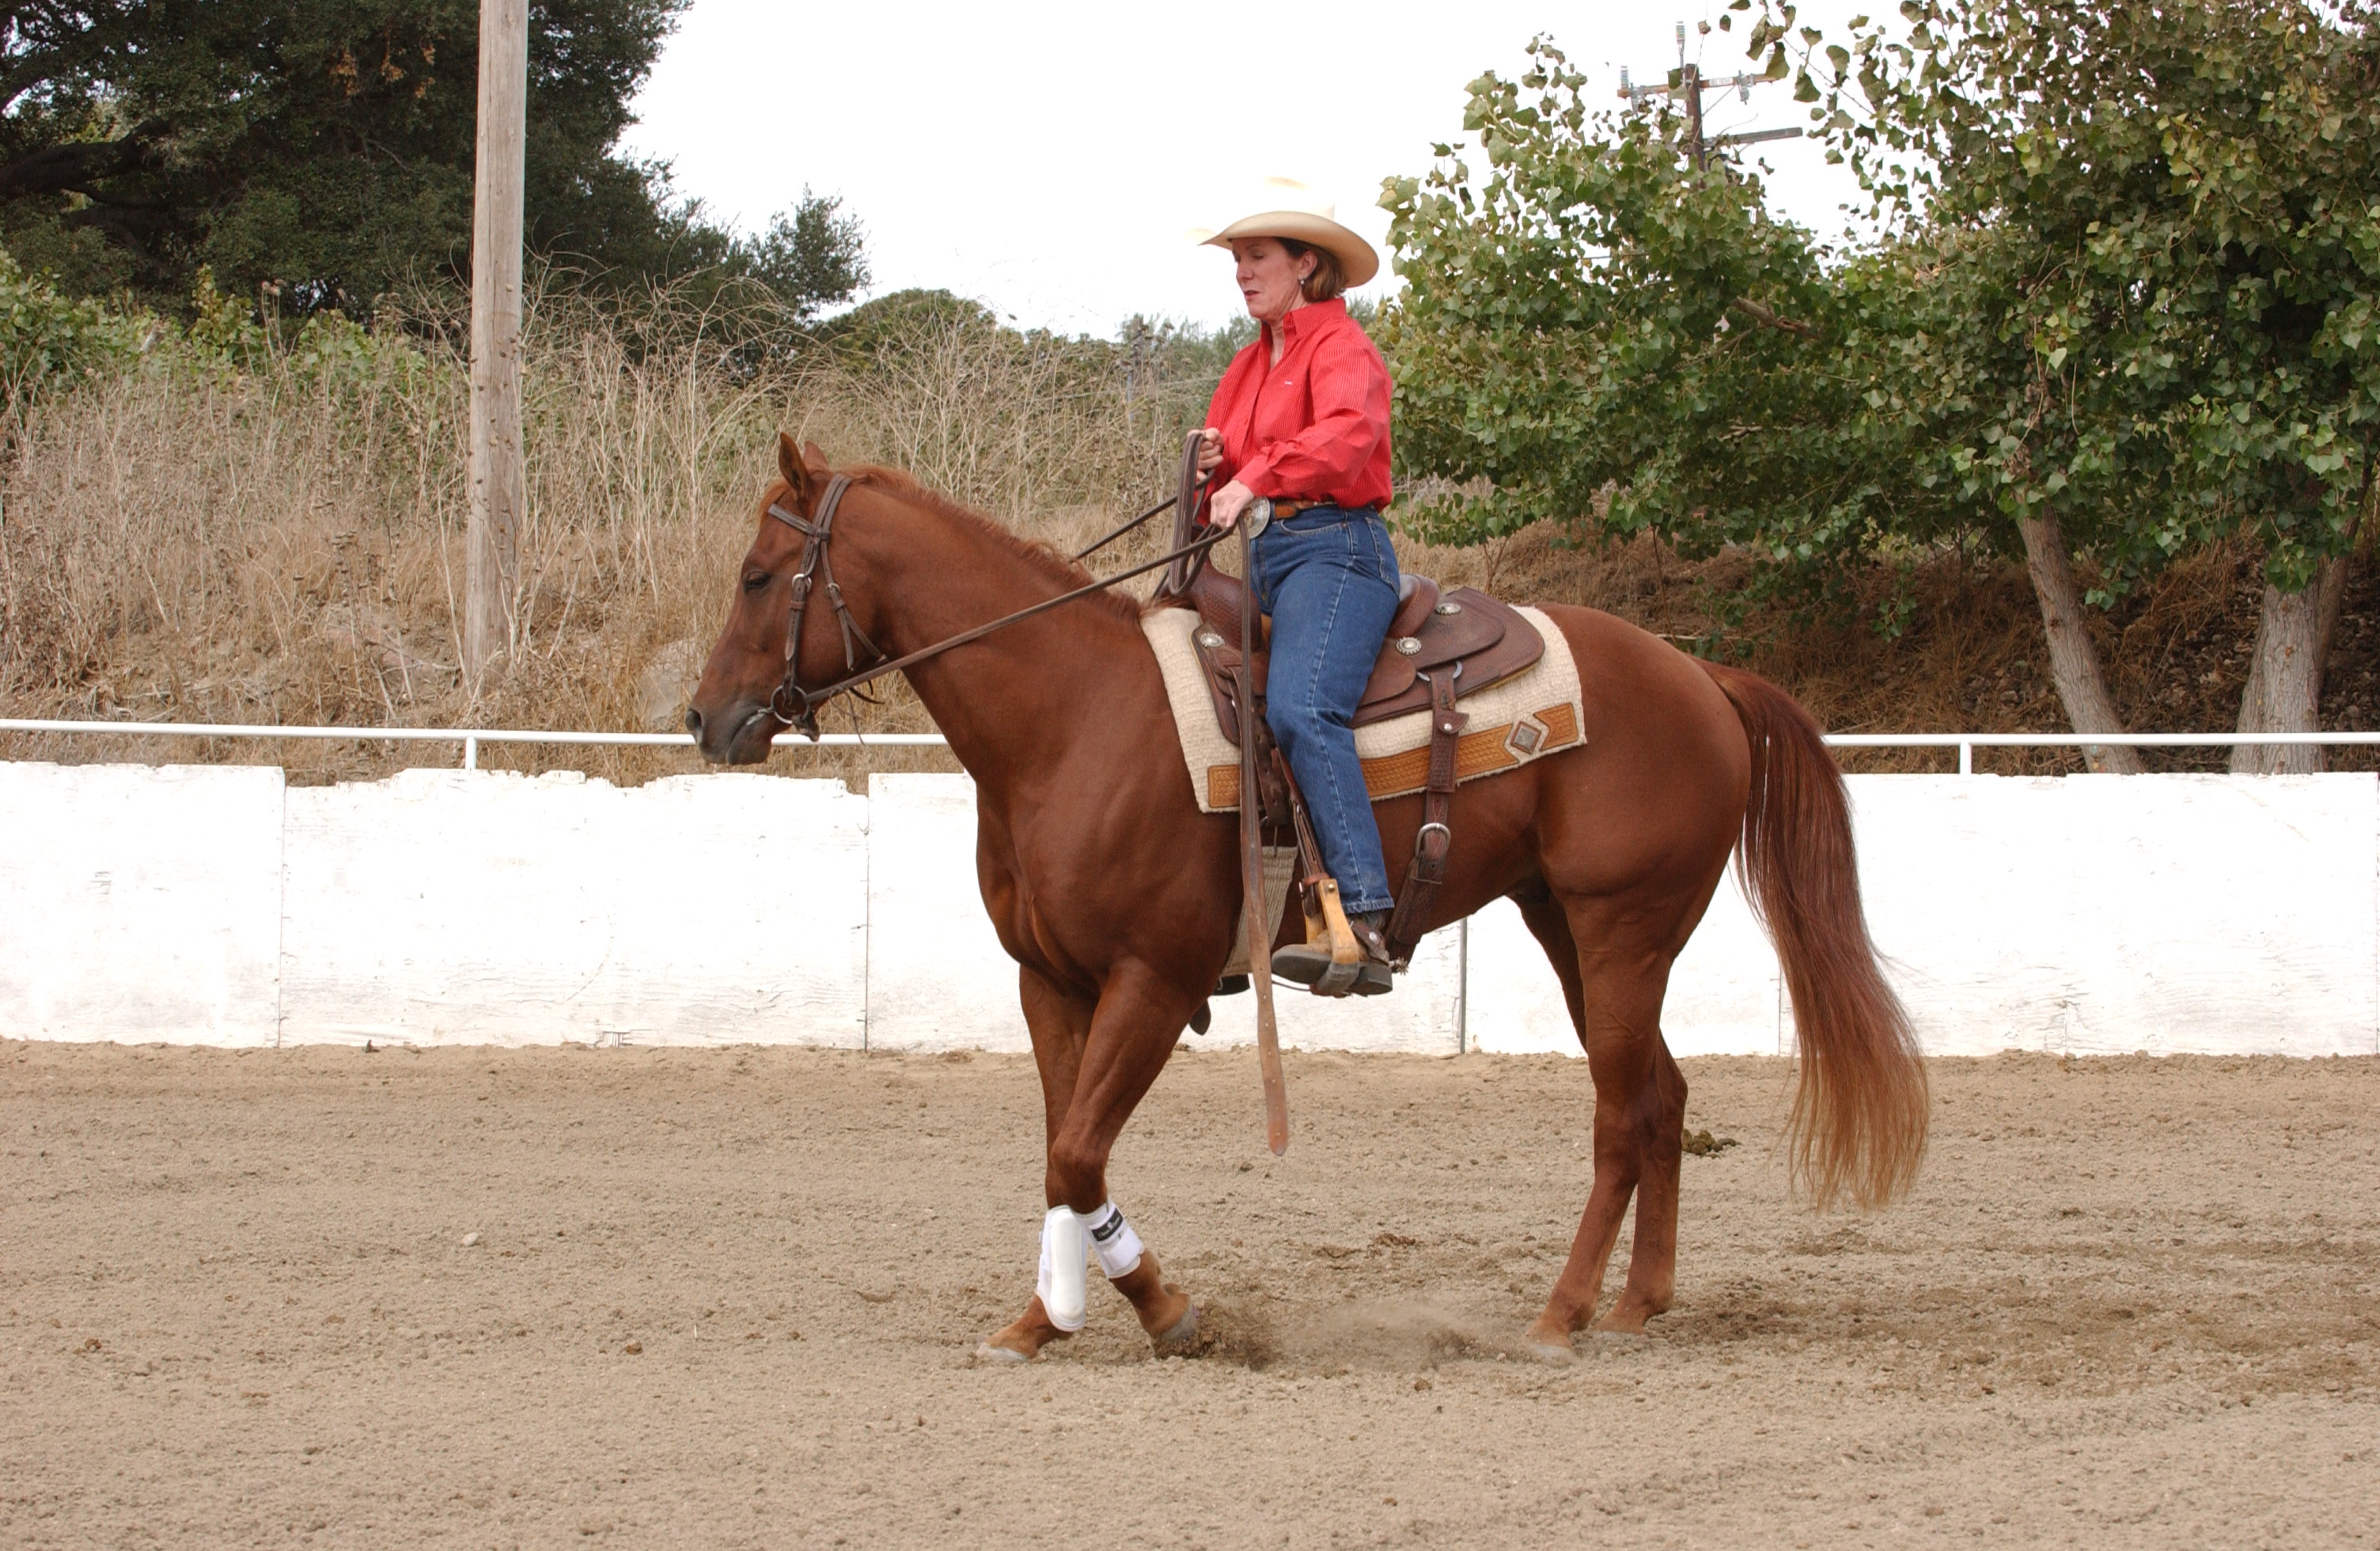
The goal. Your horse will make his circle smaller and tighter, while keeping his jaw soft and his neck level, with his nose tipped slightly in the direction of movement.

As the circle tightens to a pivot, his outside front leg will cross over the inside one. His hind legs will remain more or less in one place (you needn’t worry about either of them being “planted”).

You will want to move only as fast as your horse can maintain proper form.

Here’s how. Begin by reviewing Essential 2, Walking a Perfect Circle.

Do it in a corner of your arena, so you can use the wall as a visual marker and a physical barrier.

As your horse moves forward with energy, use pressure on the inside rein (to keep his nose tipped to the inside) and with your inside leg in neutral position (to keep the circle round), supporting with your outside rein against your horse’s neck as need be to keep the circle symmetric.

Then gradually begin to reduce the size of the circle.

When you’re ready to step around, remove the pressure of your inside leg and add a little backward pressure to the outside rein by pulling your hand gently towards your belly button (but not across your horse’s neck). Also bump with your outside leg just behind the cinch.

Remember, your inside rein is to indicate the direction of movement and to keep your horse’s nose tipped that way—not to pull your horse around. If you mainly pull that inside rein, you’ll pull your horse out of alignment. And that backward pressure on the outside rein is to suggest stepping across, and shouldn’t be used so much that it pulls your horse’s head to the outside, away from the spin or pulls him back to where he’s stepping behind or on his inside front foot. You’ll probably use your outside leg more than any other aide.

If you keep him aligned with both reins and both legs, you’ll be setting the stage for greater speed later.

In the beginning, don’t worry about speed at all — go as slowly as you must in order to keep your horse’s body properly aligned, his jaw soft and poll flexed, and his nose correctly tipped.

Be satisfied with just a step or two of the front legs crossing over before moving him back onto a slightly larger circle, re-checking proper form.

Then try again. Any time he begins to lose that proper form, move immediately onto the larger circle, reestablish his form, then try again.

Gradually, over time, ask your horse to add steps one at a time.

If you remain patient and keep showing him how to do it (as opposed to trying to force him), you’ll be surprised how quickly he’ll be willing to step all the way around.

Use a visual marker (a fence, bushes or other nearby landmarks if you’re practicing out on the trail) to keep track of how far around you’re going.

Be sure to work equally in both directions, concentrating on getting willing steps in each direction. Your horse will be stepping right around in no time!

LET US KNOW YOUR THOUGHTS 

Essential 6 Moving Off Your Leg Troubleshooting

Essential 6 Moving Off Your Leg Troubleshooting

Common problems in getting your horse to move off your leg, and how to fix them.

• Unevenness which means one end is getting ahead of the other along the fence or diagonally across the arena.

Moderate your cues for the end that moves too fast.

It’s usually the front end getting ahead, so hold the rein on that side closer to your horse’s neck in a more neutral position to slow it down and use your leg more aggressively to catch the rear end up.

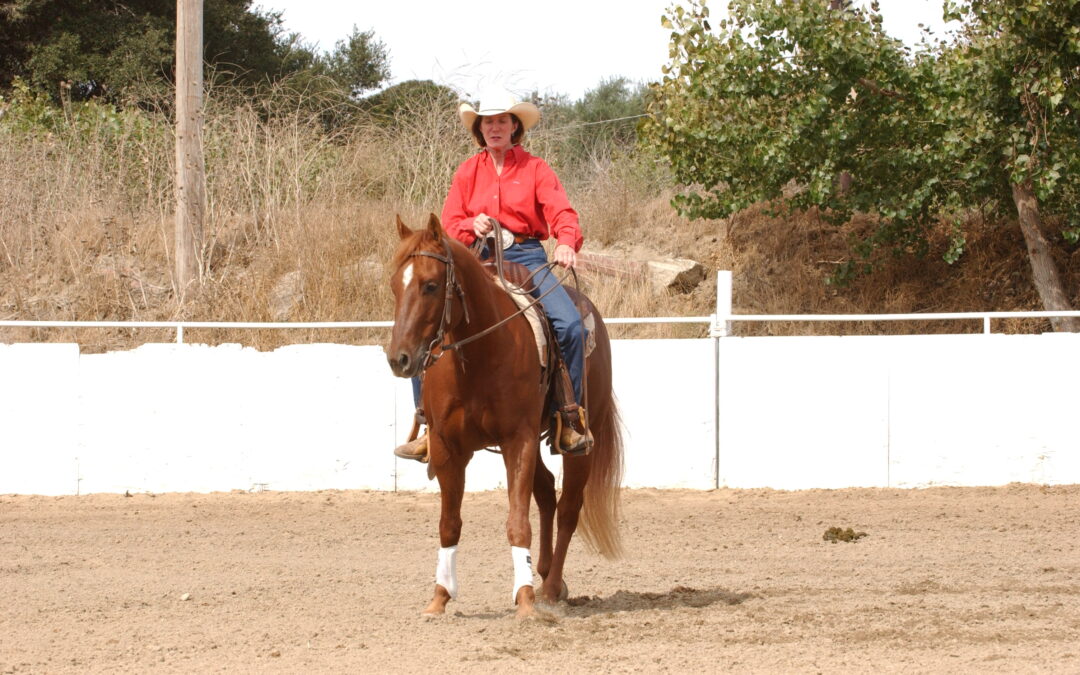
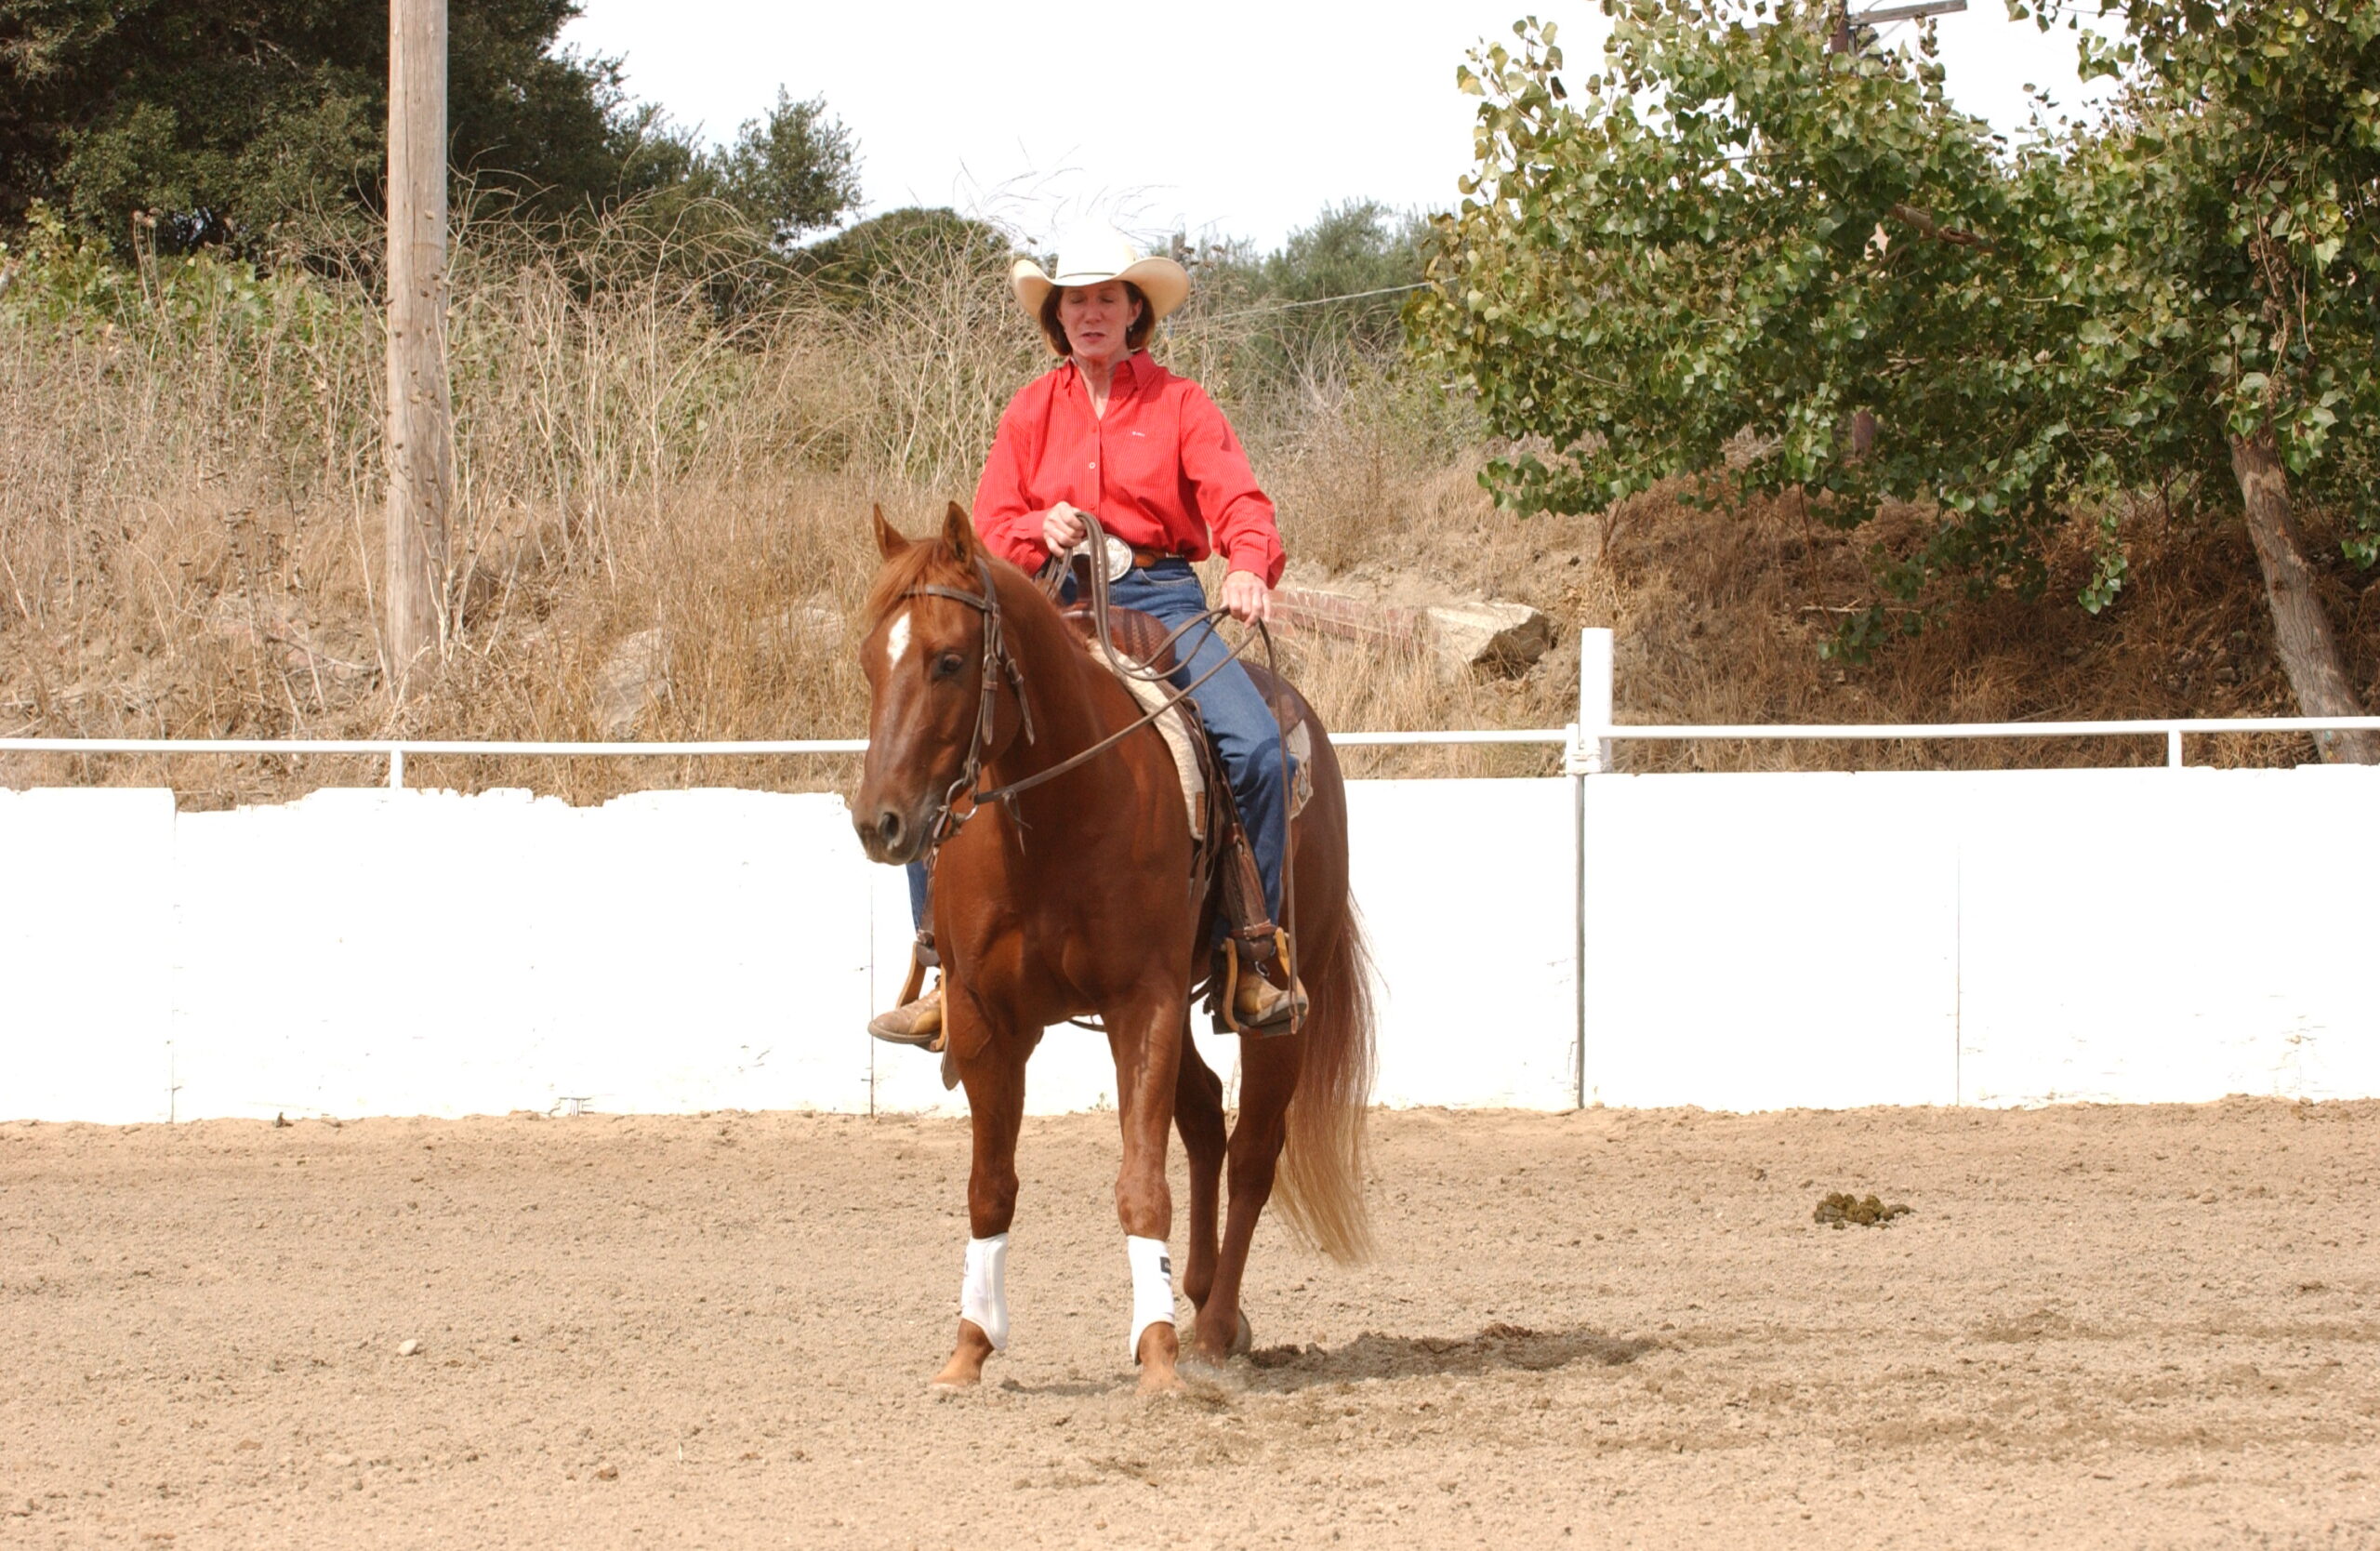
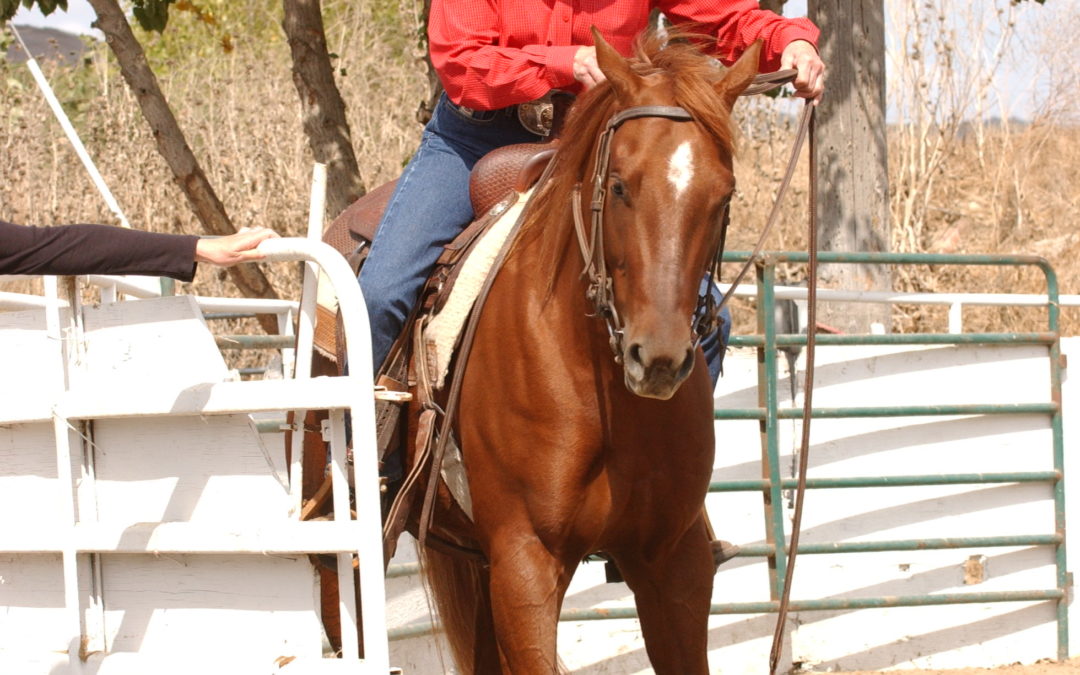
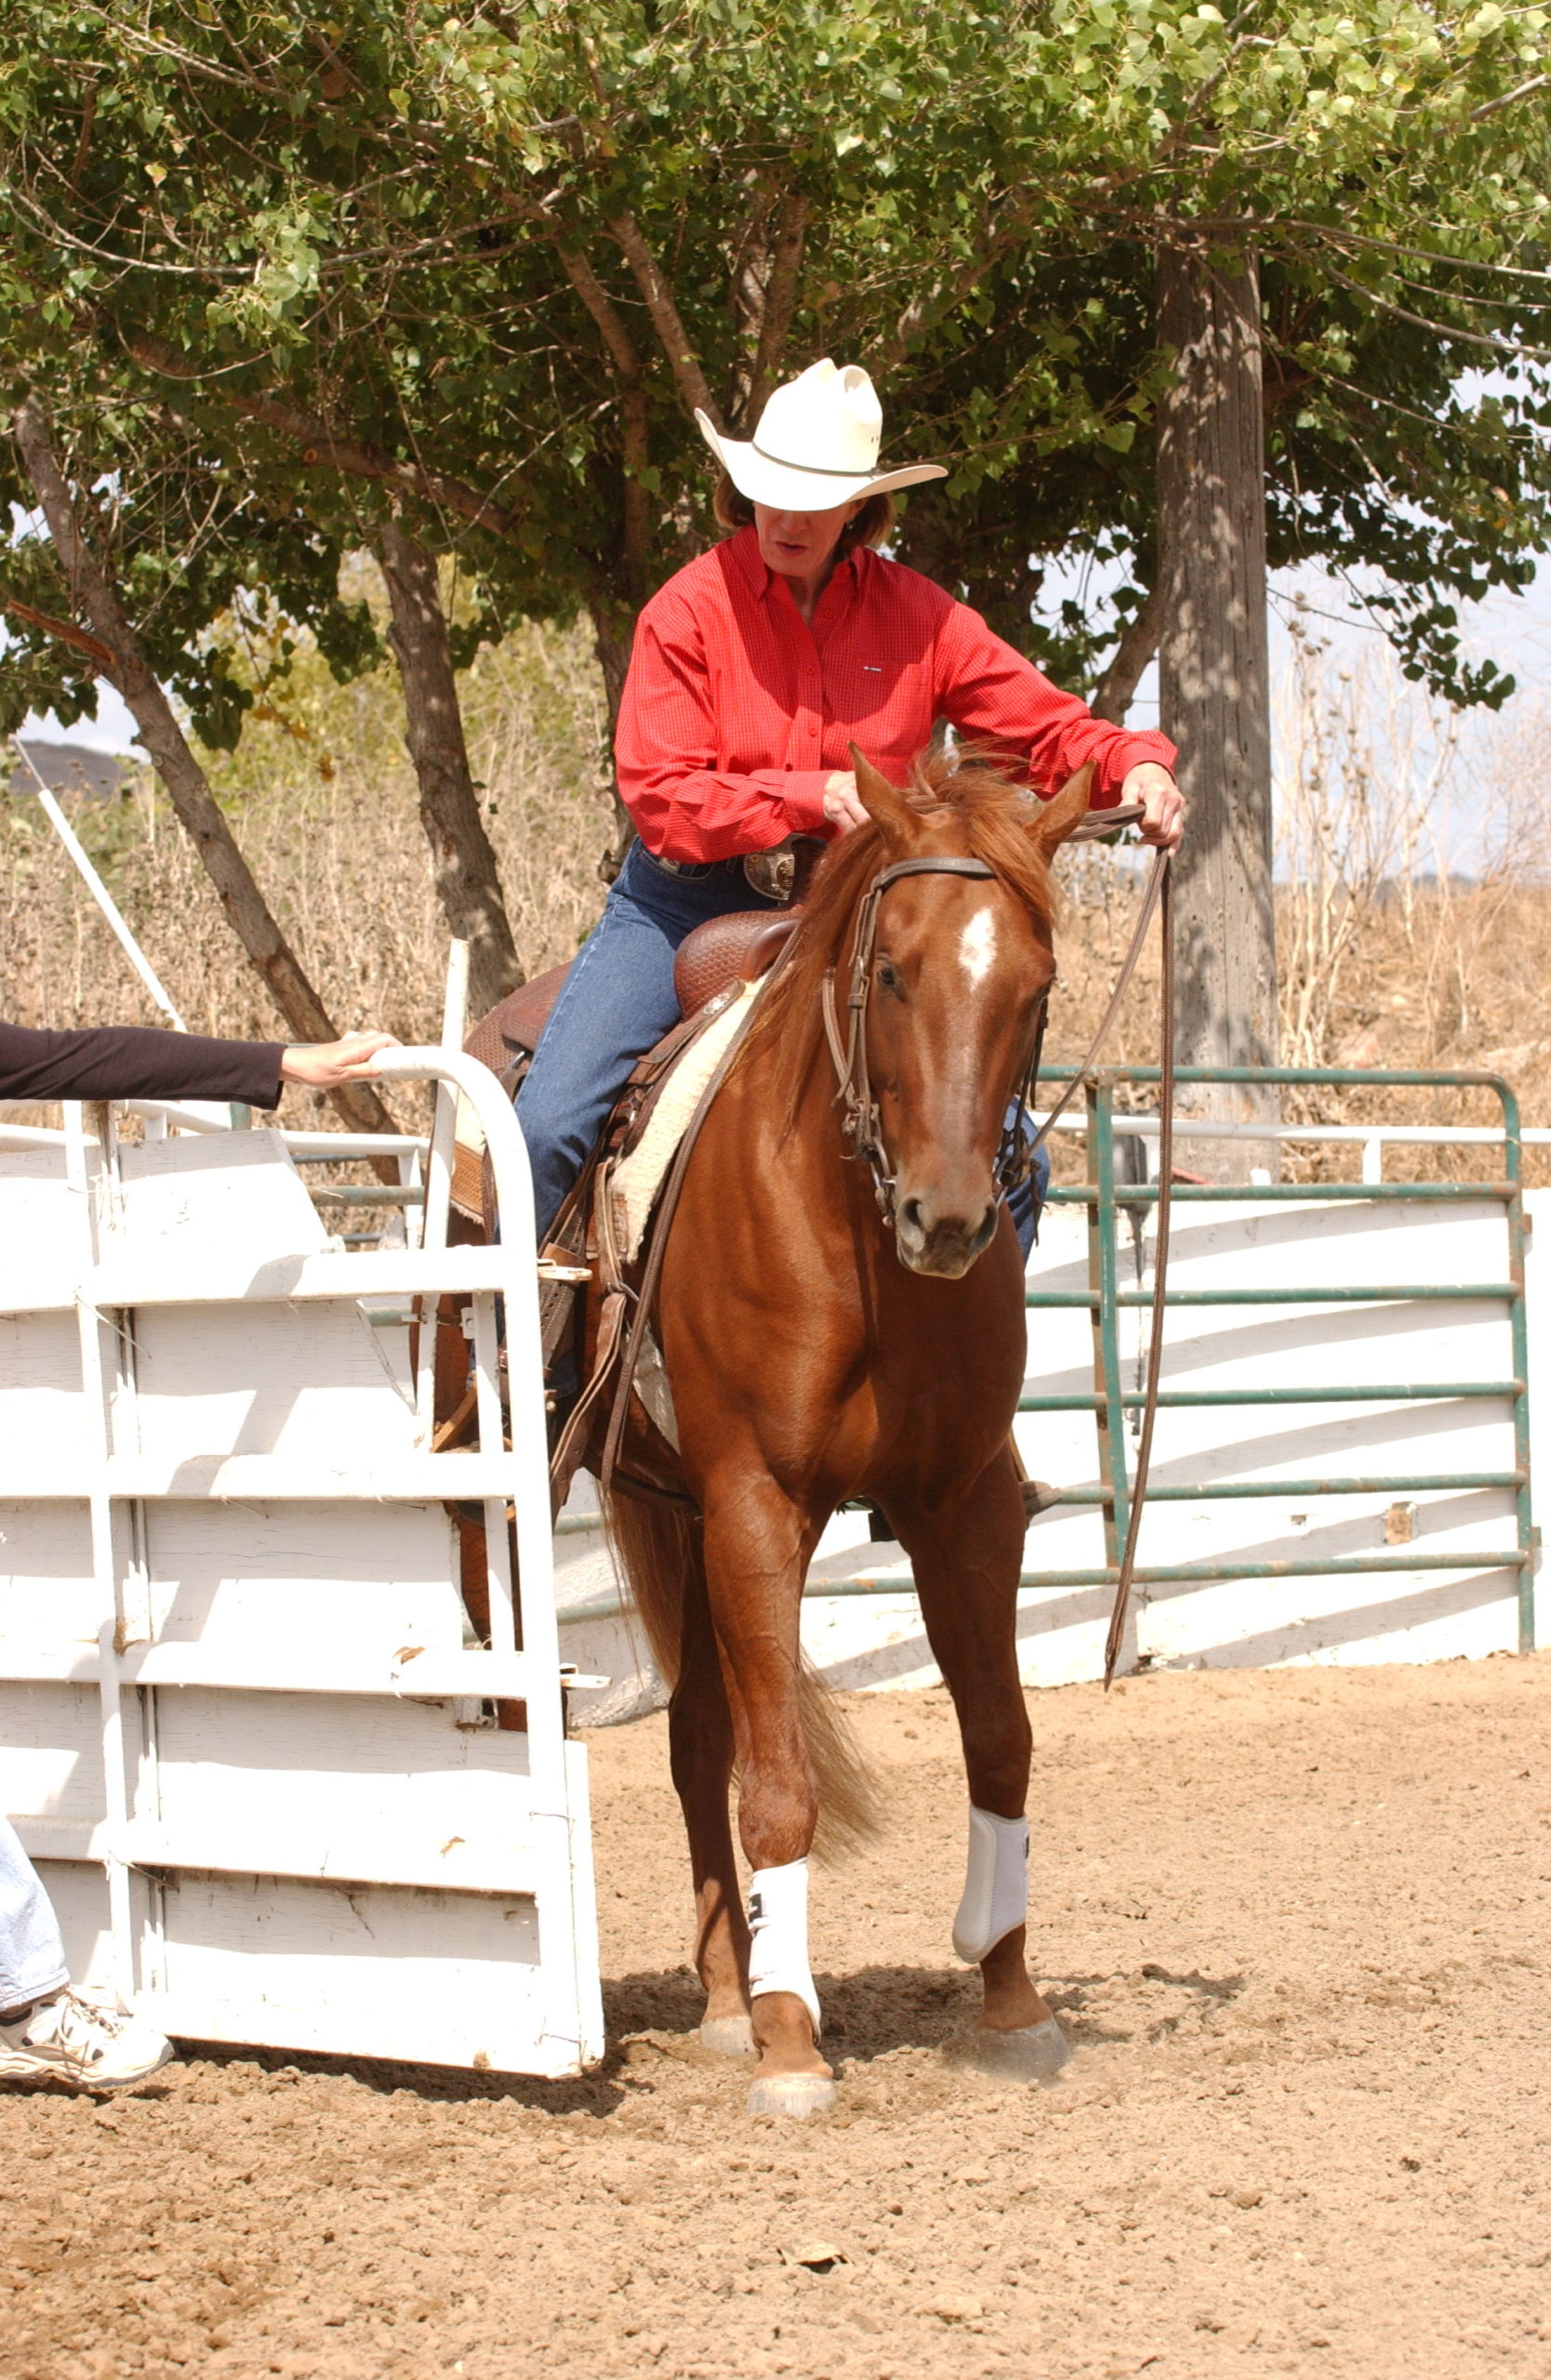
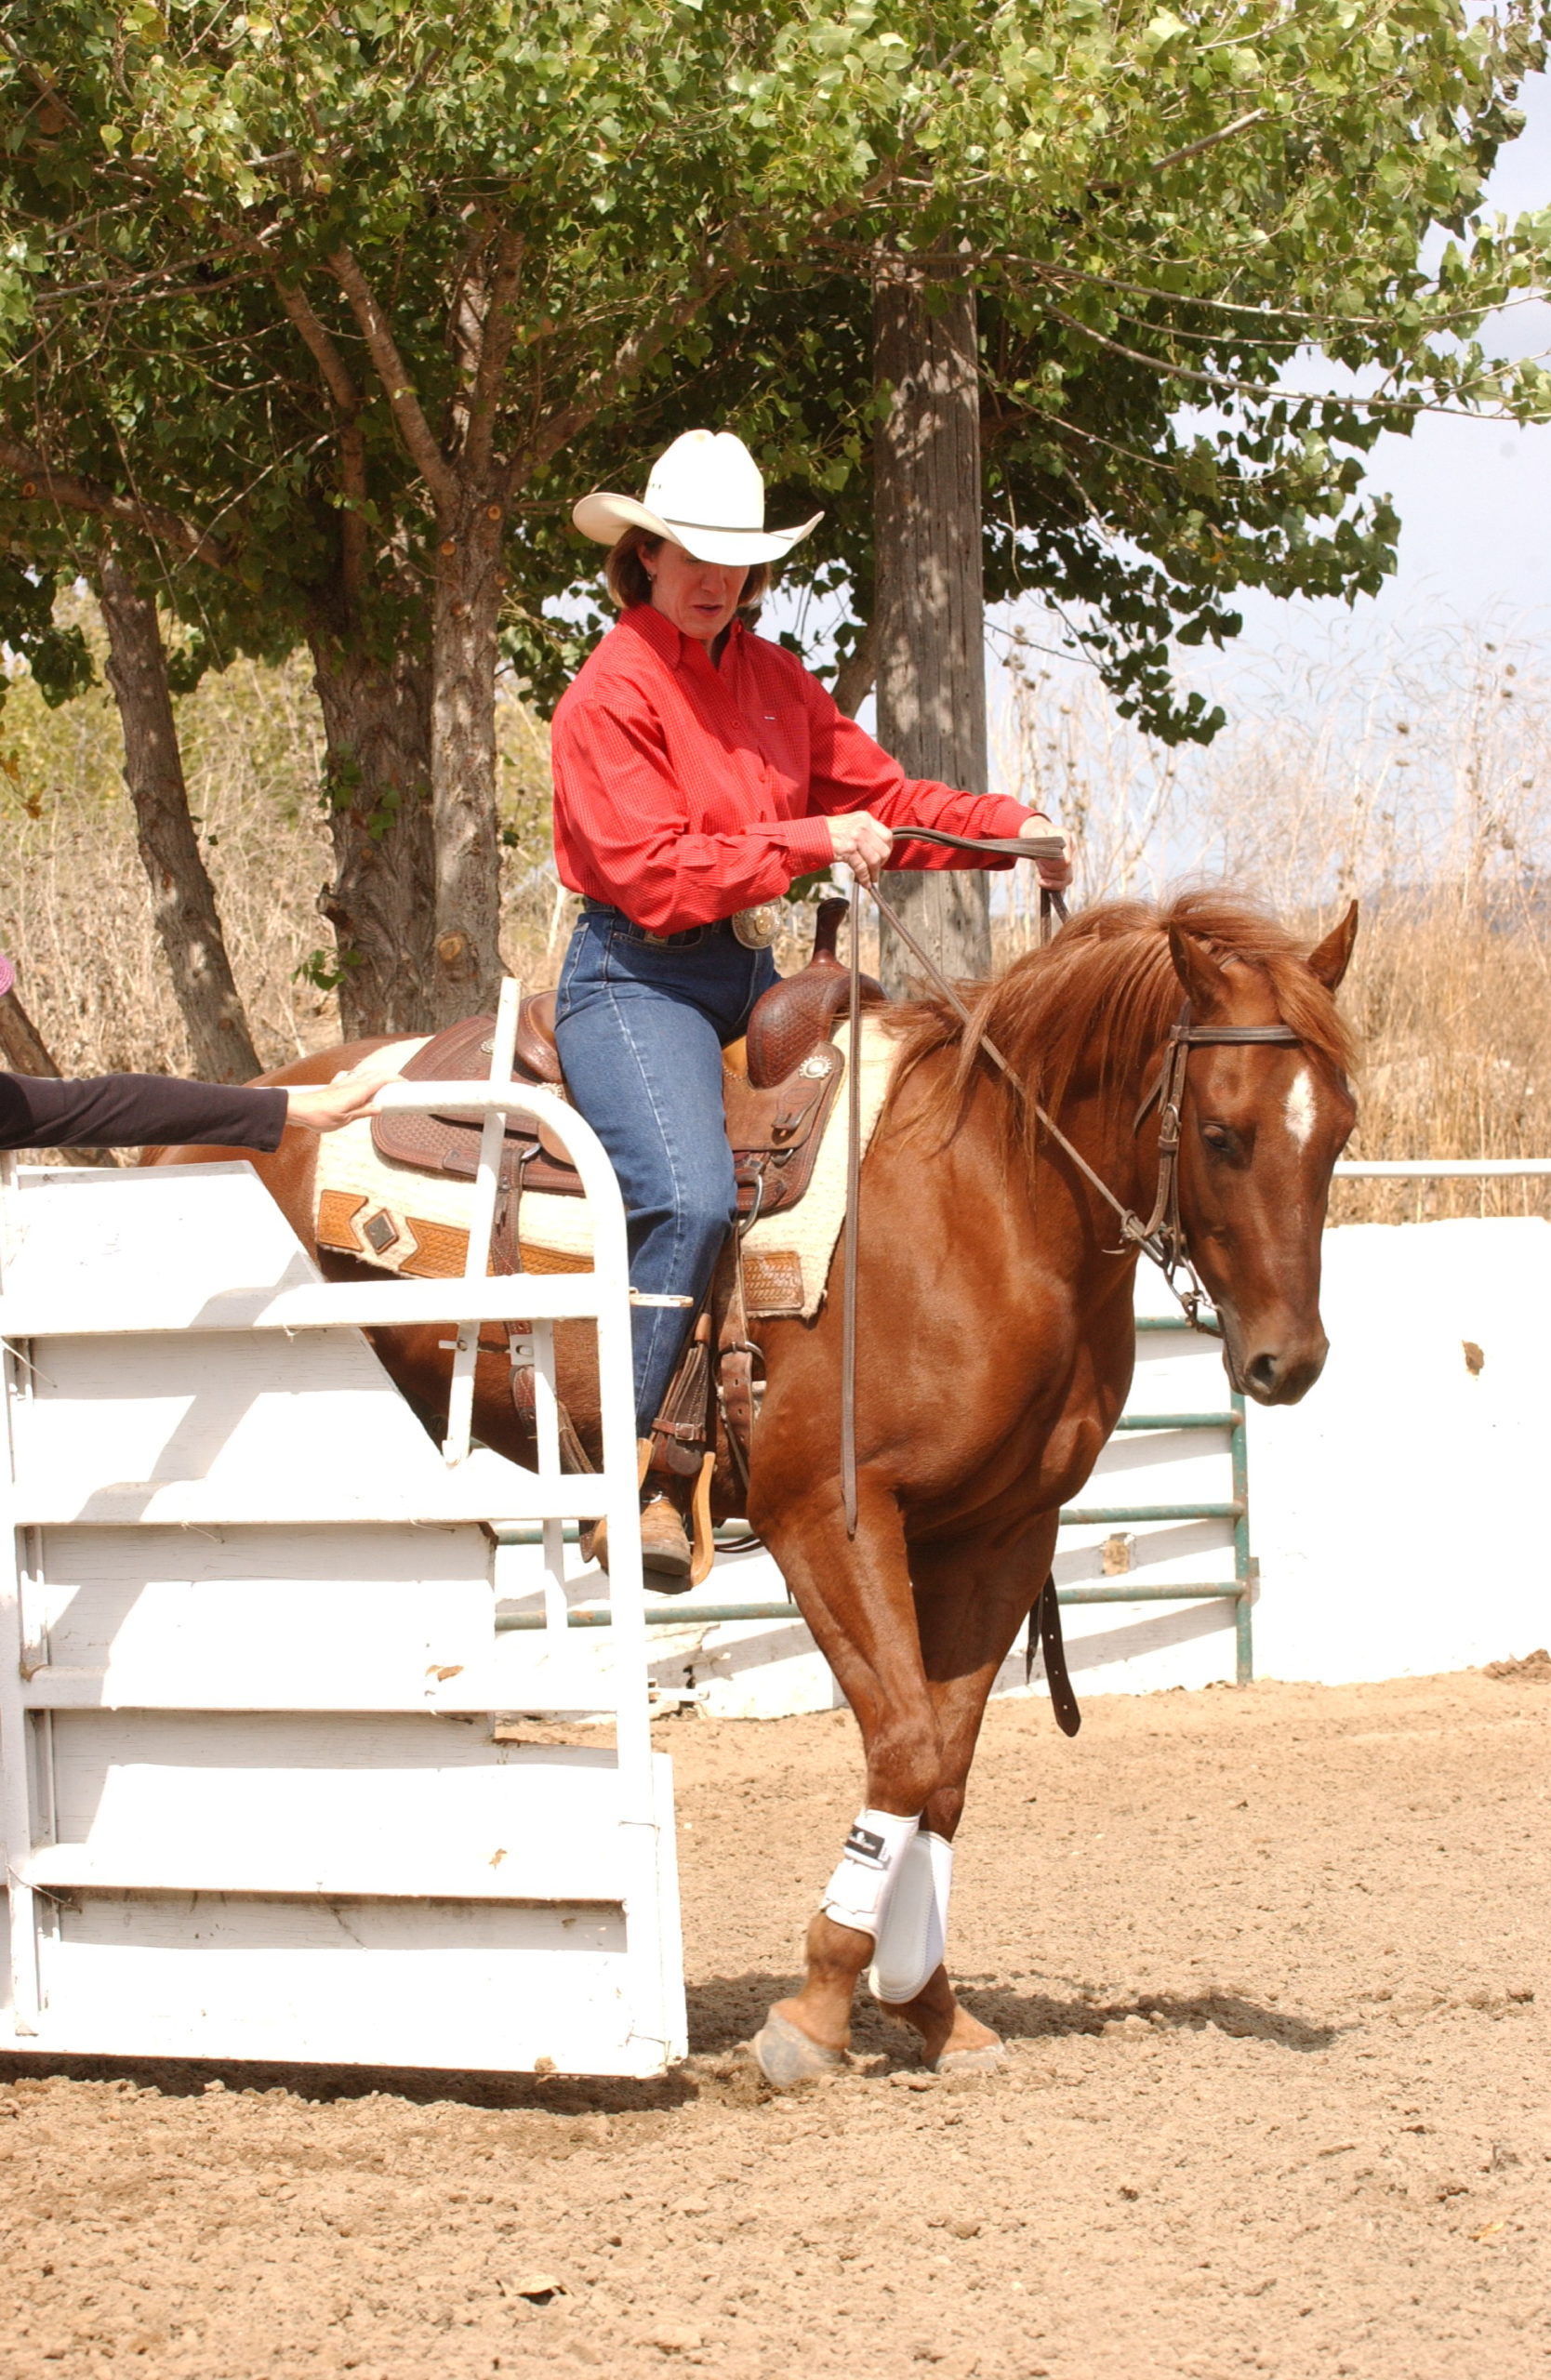
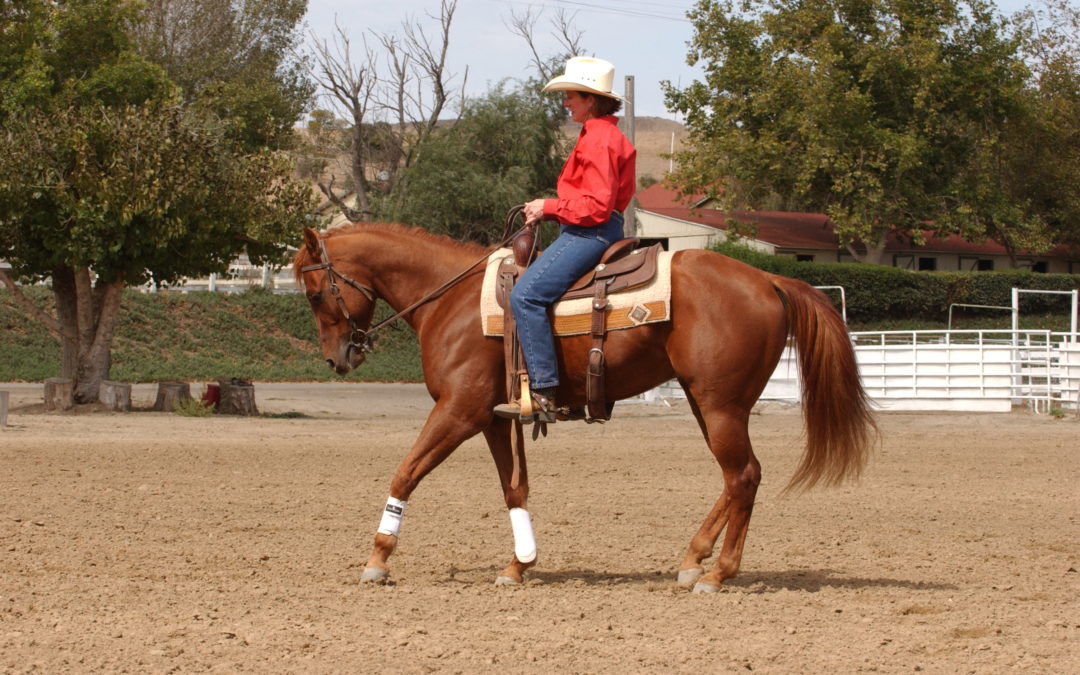
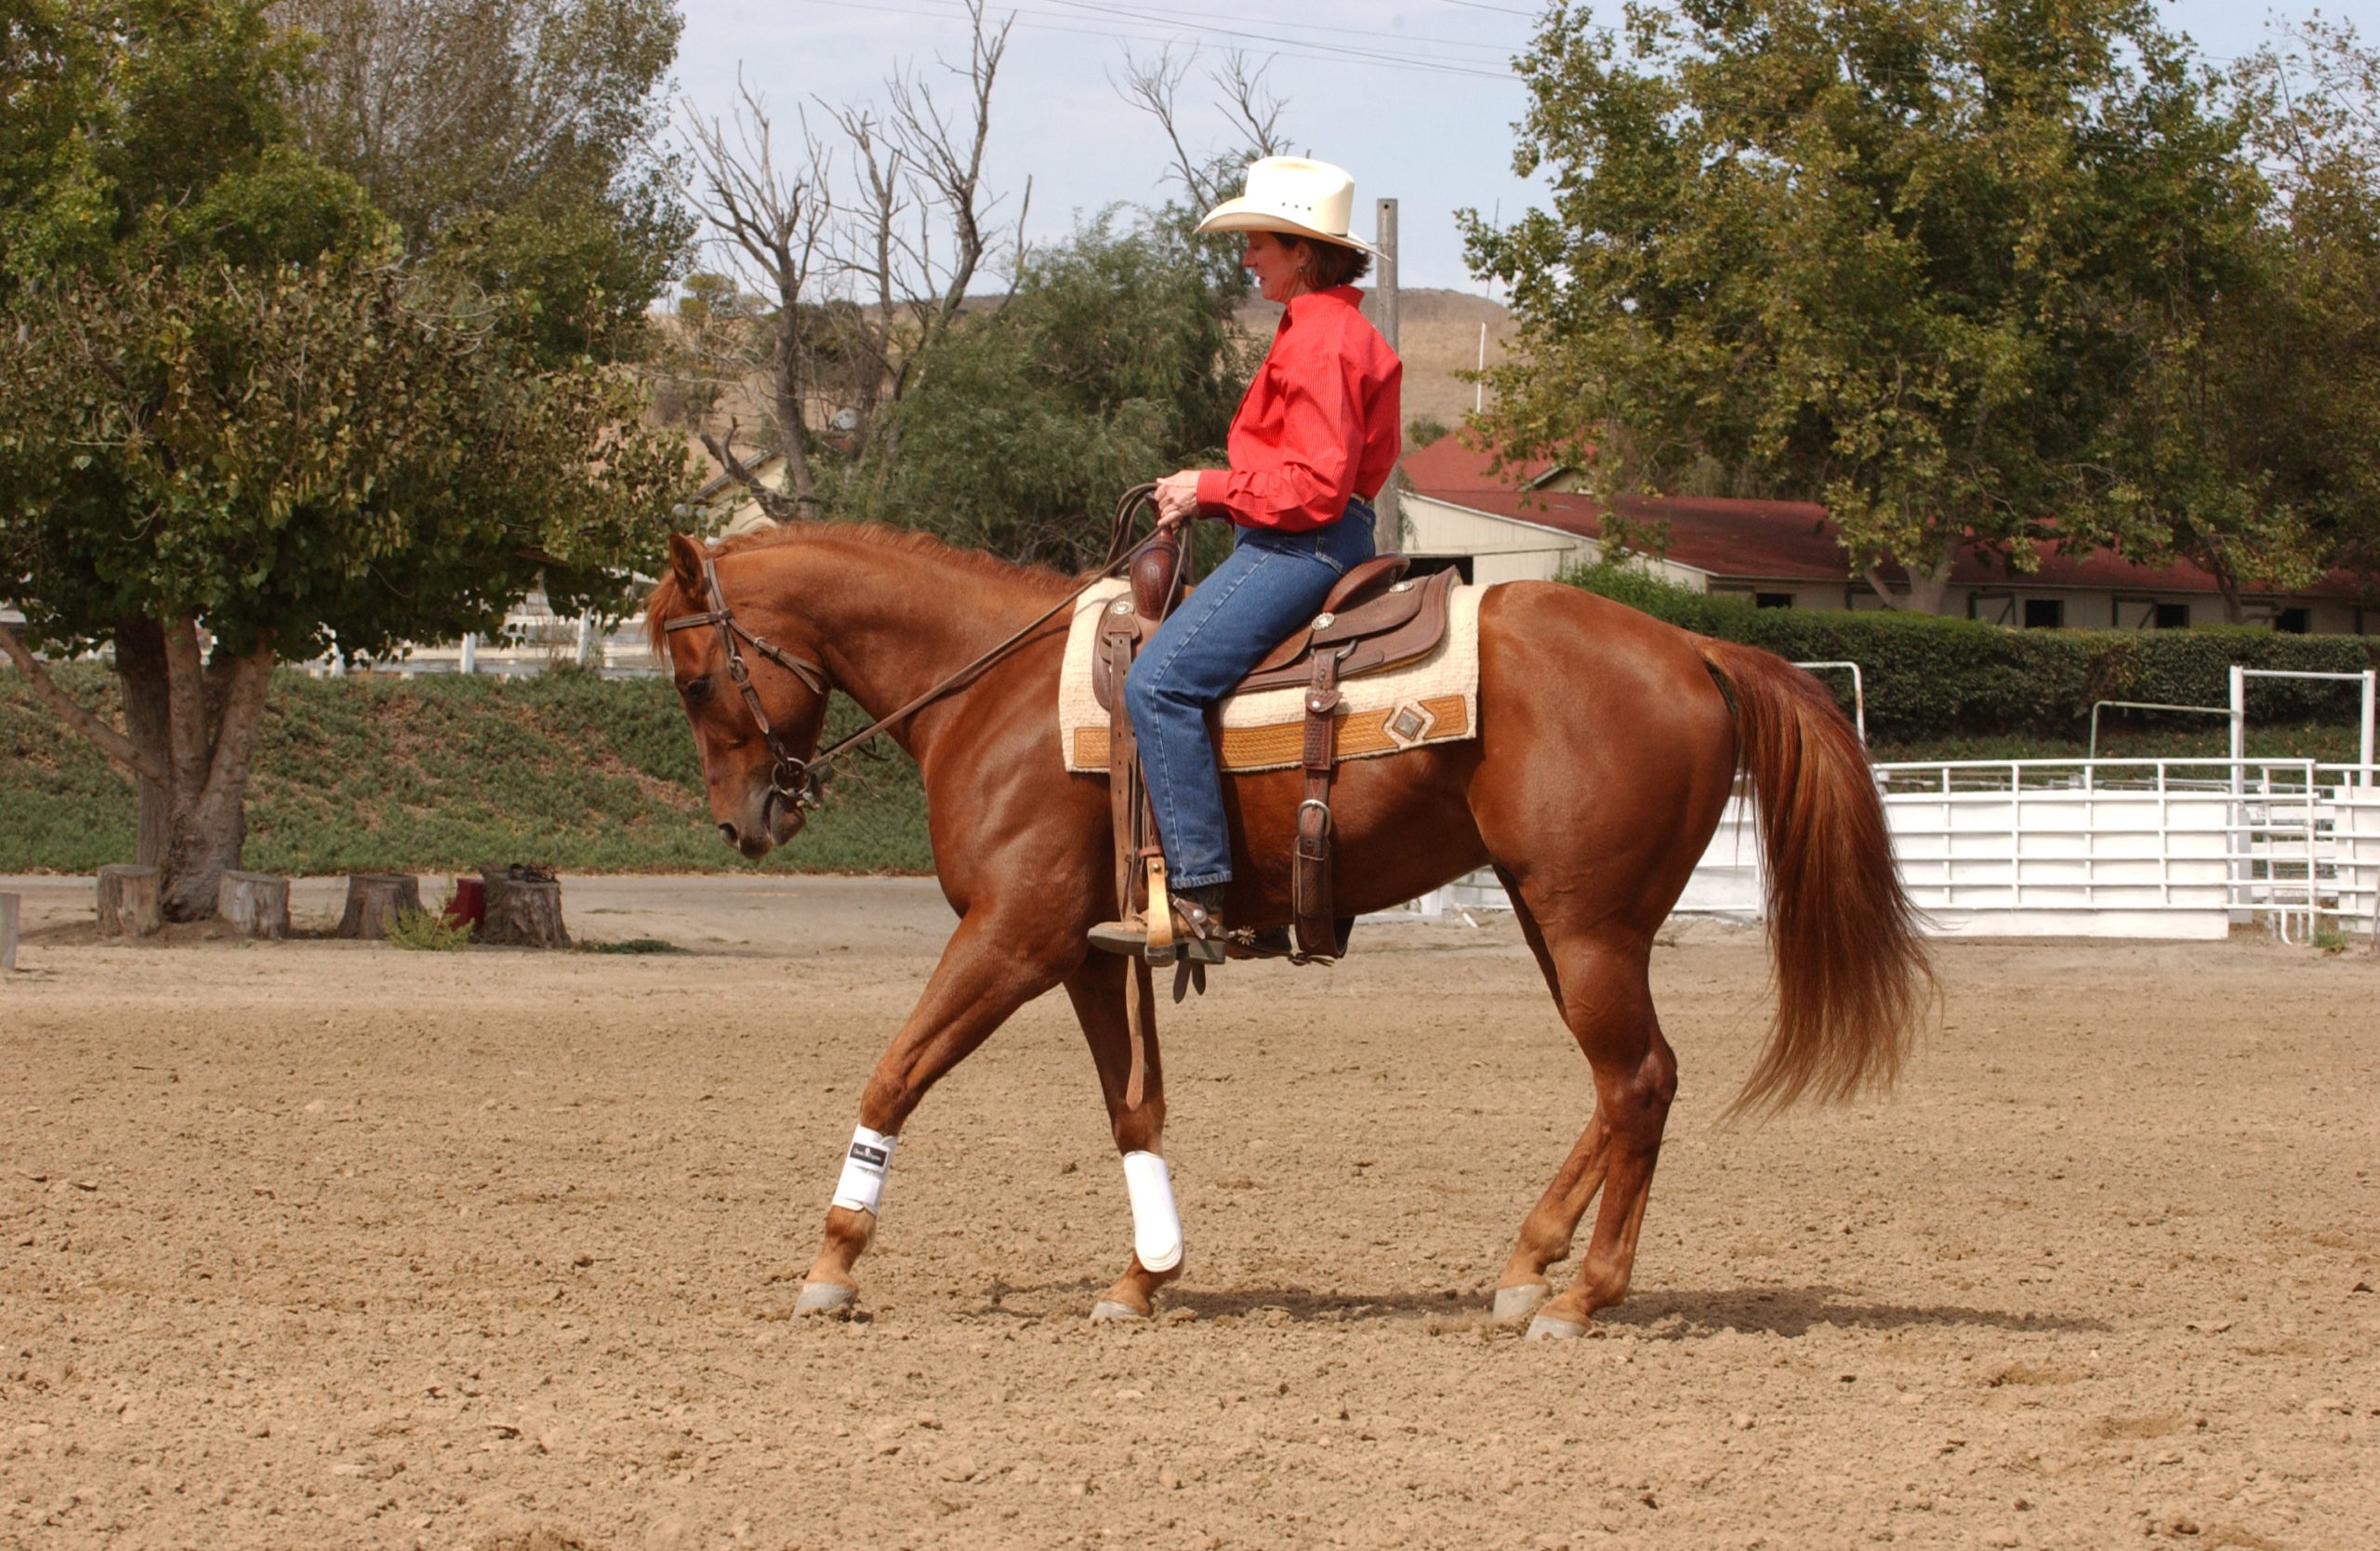
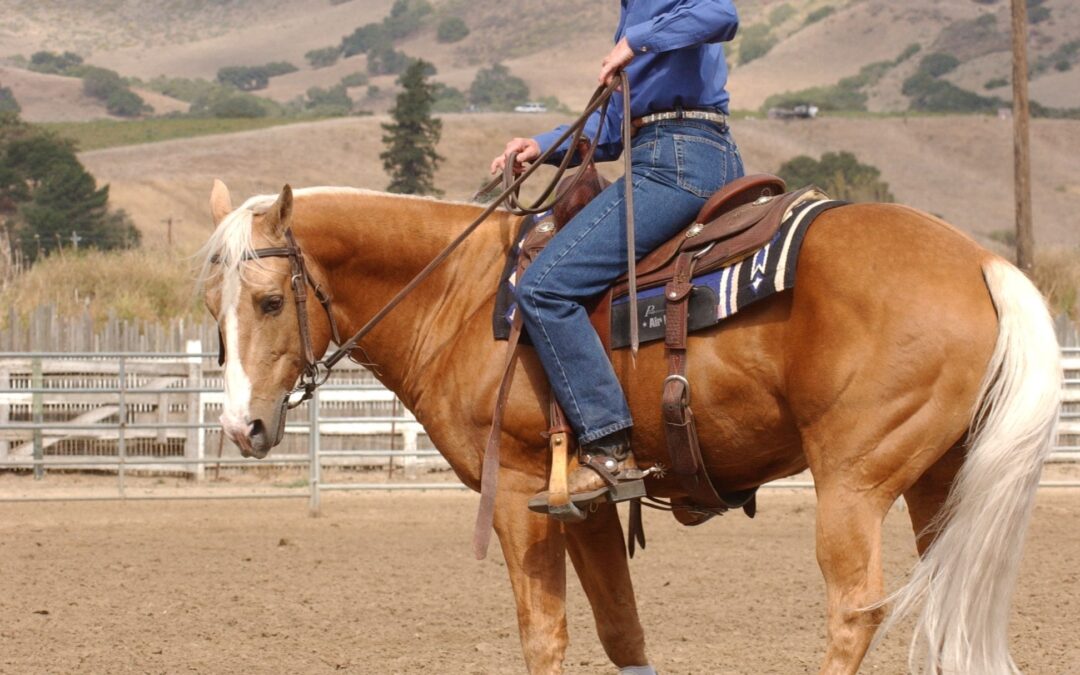
In the picture above, the horse is pretty even. If he wasn’t, my left hand would move closer to his neck to slow his front end down while I caught his hind end up with my right leg.

• Raising his head/bracing his neck.

To get him to soften, bump with both legs in neutral position for a moment while holding with both reins, to drive him up into the bridle.

If need be, bump the bit lightly on one side and then the other while you drive with your legs and go straight ahead for several steps to break up his resistance.

Then resume going diagonally.

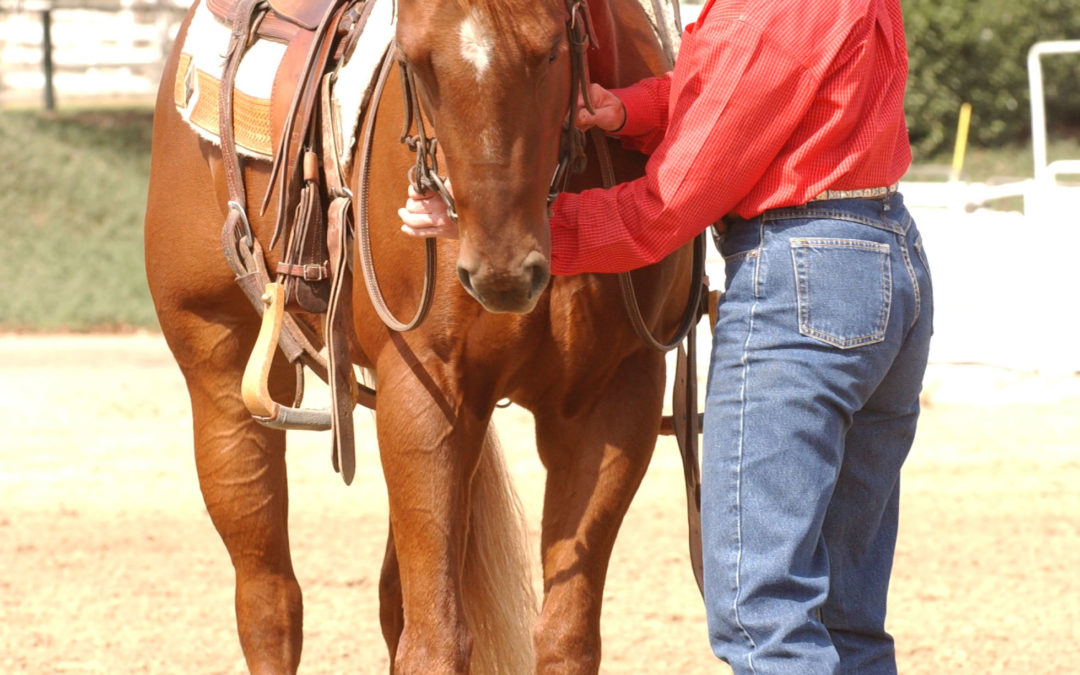
• Cranking his head off to the side (away from the direction you’re going). See in the picture above.

This is usually us compensating for the fact that our horse isn’t moving off our legs enough, so we crank their heads in an attempt to try to get them moving laterally.

Instead, try to straighten your horses head out and use your off leg more vigorously to make him move off it.

A dressage whip can be very helpful in this instance.

Lateral movement done correctly is an excellent way to get your horse responsive to your cues, more supple through his body and softer in his mouth, so do lots of it! It’s a foundation block for lots of things you’ll want to do later like opening gates, maneuvering around obstacles on the trail, and it’s challenging because it requires being able to control both ends simultaneously. That’s why I consider it essential.

LET US KNOW YOUR THOUGHTS 

Essential 6 Moving Off Your Leg While Mounted

Essential 6 Moving Off Your Leg While Mounted

In the last article we worked on teaching our horse to move away from pressure while he was tied at the hitch or wash rack, and while leading from the ground. 
 

Now, let’s mount up and see if we’ve laid a good enough foundation.

Opening a gate. Now mount up and see if you can move both his front end and his hind end in order to open a gate. Ask a friend to move the gate manually, so you have both hands free to use your reins to influence your horse’s body. 
 

Line your horse up parallel to the gate. Have your friend push it open a bit toward you as you ask your horse to step sideways with his front end, away from the gate, by carrying both your hands away from the gate while using the foot nearest the gate at the cinch to encourage his shoulders over.
 

After he takes one step with his front end, apply pressure with your gate-side heel in the same spot as you did with the sweat scraper to move his hind end over a step, too. If he resists, bump with that heel behind neutral position until he takes the step. Go back and forth in this way, moving his front end, then his back end as your friend opens the gate a little at a time. Try to stay parallel to it and move with it until it’s open. Then sit there next to it and make that the good spot.
 

Be sure to work in both directions, so your horse is side-stepping both ways. Then try to do it without someone moving the gate for you. Then, reverse all the cues to teach your horse how to close the gate. Take as long as you need to master this step before you move on to work at the fenceline.
 

At the fenceline. Still mounted, position your horse so he’s facing into, and perpendicular to, a safe fence (nothing he can catch his front feet in or get his head over). Ask him to move first his front end one step to the side, and then his hind end, then his front again, and so on, so that he’s moving sideways down the fence.
 

To ask the front end to move, bring both your reins over in the desired direction while bumping with your “opposite” foot at the cinch. (That is, if you’re asking for a step to the right, carry your reins to the right while bumping with your left leg just in front of neutral position.)
 

After he’s taken one sideways step with his front end, use the same leg to ask his hind end to move, only this time bumping a few inches behind neutral position.
 

Throughout, adjust your reins as necessary to keep your horse’s neck straight and roughly perpendicular to the fence. When he can do it moving freely, front end and then back, try to move his whole body at the same time. Get this down well before moving to the next exercise.
 

Diagonally across the arena. Starting in one corner of your arena, ask your horse to walk forward and sideways diagonally across to the opposite corner, moving first his front end, and then his hind end, then the front again, and so on. Let’s say you’re in a right-hand corner, and will move him diagonally to the far left-hand corner.
 

Squeeze with both legs in neutral position to send him forward, then to move his front end to the left, bring both reins toward the left and bump with your right leg at the cinch.
 

Then keep forward motion going with a squeeze from both legs, and to move his hind end over, bump with your right leg a few inches behind neutral position.
 

Then repeat the sequence, working your way diagonally across the arena. For every step forward, you’ll move one step sideways. As your horse comes to understand better what you’re asking, work toward getting him to move both ends at the same time in a true leg-yield. You’ll be carrying your hands to the left, and using your right leg in neutral position– just behind the cinch.
 

Reverse all cues and work in the opposite direction. Be sure to provide equal practice going each way.
 

When your horse is responding consistently well at the walk, try it at the trot, and eventually the lope.

LET US KNOW YOUR THOUGHTS 

Essential 6 Moving Off Your Leg On the Ground

Essential 6 Moving Off Your Leg On the Ground

Getting your horse to move off your leg (or move laterally) is key to getting control of his whole body. Lateral control of the hind end and shoulders helps you in simple things, like opening and closing gates or backing in a straight line. It also makes possible more advanced maneuvers, like changing leads and spinning.

Horses naturally move into pressure, so young or green horses must be educated to move away from it, instead.

Ultimately, lateral control will enable you to “leg-yield” your horse diagonally across the arena at a lope–resistance-free, body straight, front legs crossing over each other. It will also help you execute a perfect sidepass, such as moving sideways down the length of a log, as in a trail class, and will help you with a beautiful spin.

For now, however, we’ll be satisfied with any movement sideways in response to leg pressure; the more refined lateral control will come later. In these exercises, you’ll ask your horse to move his rear end over as you stand next to him (at the hitching rack and then as you hold his bridle reins) and while you’re mounted (maneuvering him next to a gate to open it, sideways along the fenceline, and finally diagonally across the arena).

The goal. Your horse will maintain a soft face (that is, no bracing against the bit) as he (1) willingly moves his rear end a few steps sideways in response to pressure, and then (2) willingly moves his front end (shoulders) a few steps sideways in response to pressure. You’ll work toward getting both ends to move together, for a whole-body move to the side.

In the movement at the gate and along the fenceline, and in the more advanced maneuver diagonally across the arena (leg-yield), he’ll move first his front end and then his hind end separately at first. Ultimately, he’ll move both ends simultaneously in the leg-yield.

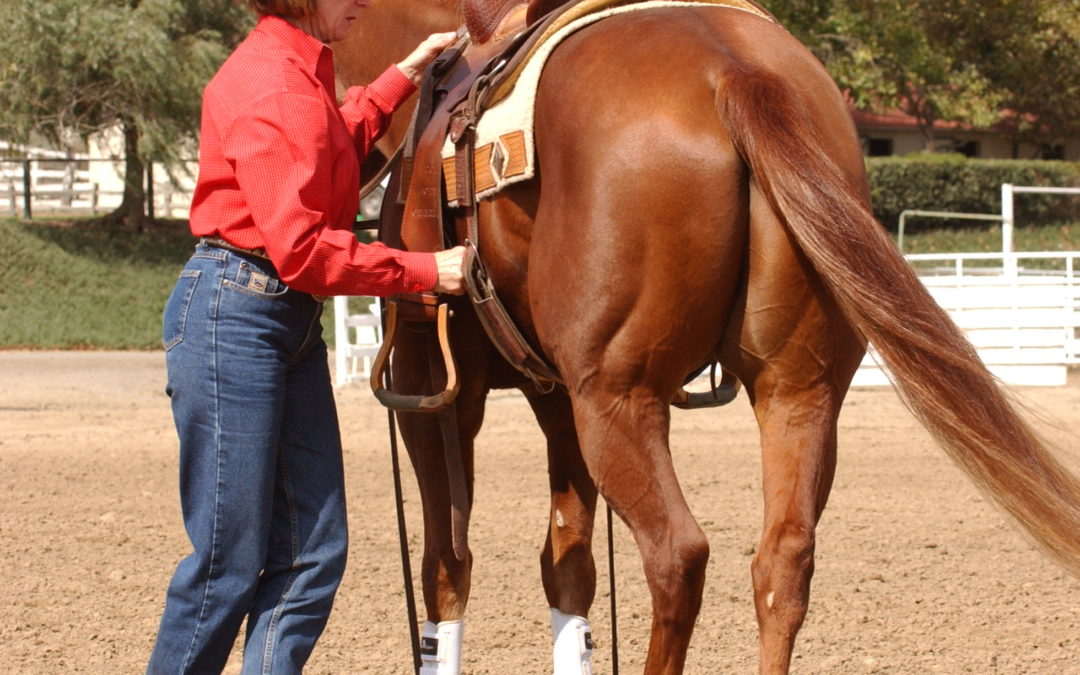
Here’s how: at the hitching rack. Practice this one whenever you’re grooming your horse. (NOTE: If there’s any chance your horse will pull back, untie him before conducting this lesson.) Stand at your horse’s side, and use a sweat scraper, hoof pick, or other hard object to create pressure (that is, mild discomfort) right where your heel presses on your horse’s ribs when you’re mounted. Your aim is to have him respond to the least amount of pressure possible, so start softly yet insistently. Don’t start with a jab.

The instant he takes one sideways step with a hind foot, stop and praise him, then ask for another step. If he resists, increase the pressure gradually in a push-and-release movement until he takes at least one step, always looking to get response from the least amount of pressure, and praising him the instant he responds. If need be, you can also pull his face towards you slightly as you ask him to move his hindquarters over.

Now go to his other side and ask him to step in the opposite direction, using the same cues. Repeat frequently from both sides until he responds willingly to mild pressure.

In hand. With your horse wearing a saddle and bridle, stand next to him, holding the bridle reins in your left hand and using the sweat scraper, hoof pick, or your thumb to create pressure, again just behind the cinch where your heel would normally be. By now, your horse should respond with a sideways step even as you use the bridle reins to keep his head straight. Strive to get him to move just his hind end over. We’re “disengaging” the hind end. You’ll want to be sure he’s good at this, as it’s the underlying secret to the emergency stop.

Switch hands and repeat from the other side.
LET US KNOW YOUR THOUGHTS 

Reining Essential 5 – Troubleshooting Whoa

Reining Essential 5 – Troubleshooting Whoa

Teaching a horse to stop brings out all kinds of problems, not because the horse wants to be bad, usually it’s our lack of timing, and balancing on the reins that causes their resistance.

Troubleshooting. Common problems in basic stopping, and how to fix them: 
 

• Not trying to stop at all:

Use the doubling and/or circling maneuvers. Getting pulled around and/or circling will start to feel like a lot of work to your horse, so he’ll learn that simply stopping is easier. Once his feet stop moving, release all aids and sit while you praise him. 
 

• Stopping reluctantly:

Get a bit more assertive with your hands as you’re backing him a step or two once he does stop. Then sit quietly for a while and scratch his neck.
 

• Stopping on his front end (he’ll feel as if he’s propping on his front end and you’ll feel like you just got “dashboarded” in a car).

Shift his center of gravity back by sitting back yourself and picking up your reins chest height, (don’t pull down toward your hips) and holding them steady while you bump with your legs in neutral position until your horse picks up his shoulders and backs up off the bit. It will feel as though his shoulders have lifted up into the area under the front of the saddle and his back has rounded. Then, the next time you ask for the stop, make sure you’re driving him with your legs to keep his hind end engaged as he stops and then backs up off the bit. Also, be sure you give him a chance to stop before you pull, and let him rest when he does.
 

• Stopping crooked (by leaning or dropping a shoulder).

You’ll probably notice that your horse leans to his left side (because of that natural asymmetry of horses) and/or towards the magnet of the barn or the out gate. This causes him to kick his hip out to the right when stopping.
 

First, don’t ask for the stop if your horse is moving crookedly—go around again and use your reins and legs to straighten him out, then ask. If, despite your best effort, he still stops crooked, back him for a few steps on the straight line you were originally on, then turn him 180 degrees away from the barn or whatever was the magnet.


For example, if he’s leaning left then you’re correcting him to the right, bring your right rein back towards your right outside belt loop and let your left hand come toward that same belt loop, only stopping at his neck (without crossing over it), as you push him with your left leg at the cinch and roll him back to the right. This will help you get his shoulder realigned, so he keeps them both picked up.


Hope these ideas help!


LET US KNOW YOUR THOUGHTS 

Reining Essential 5 – Whoa

Reining Essential 5 – Whoa

Your horse’s willingness to stop when you say “whoa” is essential for control and basic training. It also provides the foundation for one of reining’s most thrilling maneuvers, the sliding stop. But first, we’ll have to be satisfied by an attempt from our horse, at ceasing forward motion. It’s not going to look anything like the stop we’ll need in competition, where the horse is balanced, off the bit, driving from behind with his back round and his head low, gliding into the dirt (I get goosebumps just thinking about it!)

But all things in good time. The key thing now is to get your horse to love and even crave stopping. That means don’t make it uncomfortable for him. Make it as easy as possible for him. Set him up for success by making sure he’s a little tired and wanting to stop, then aim him toward a wall or a corner, if need be, so he has a visual barrier. This is much preferable to trying to force him to stop by overpulling on the reins, which he doesn’t understand yet anyway. Then exhale, sit down and say “whoa,” get stopped, then praise him, and let him sit for a while. Enjoy the scenery!


I
f you do it right, you’ll be surprised how quickly your horse will learn to stop when he hears whoa. In fact, he may start to stop when he feels you begin to exhale. 


True story: One non-pro I coached had to take a lot of cell phone calls while he was riding. Whenever his phone rang, he’d stop and answer, sitting and talking for a while. Well, it didn’t take long before his horse started doing these really nice stops at the first ring! Horses remember the very last thing they were doing before the reward. This horse knew the ring meant there was a nice sit-a-spell coming right after his stop, so stop he did!


The goal.
 When you sit deep, exhale, and say whoa, your horse will come to a comfortable stop on his rear end, then back a step, all preferably without your having to pull on the reins (although you probably will need to pull in the beginning, until he understands). 


Here’s how. 
Prepare to make stopping your horse’s idea (remember: make the right thing easy!) by loping him until he’s a bit tired and thinking about wanting to stop. As you lope, work on getting him soft in the face by using both your legs in neutral position to drive him into your hands. Work on circles, asking him to bend by using pressure or bumping from your inside leg in neutral position. Get him all softened up.


When he’s ready to volunteer to slow down (you’ll know because you’ll have to keep pushing to keep him loping), ride him onto a straight line toward your arena wall or a corner. You’re going to ask for the stop when you’re about three or four strides from the wall or corner, so give yourself enough space to be able to straighten him out before you get to that point.


Don’t worry about exactly where his feet are (from all those books you’ve read); if you exhale, then say whoa, you’ll be asking in the right part of his stride to make it work.


So, when you’re about three or four strides from the wall or corner, just when he’s starting to wonder which way you’re going to go, take a long breath, exhale as you sit deep in the saddle, and at the end of the exhalation, say whoa in a low, smooth, authoritative voice. (If your voice is tentative, abrupt, or too drawn-out, it will be less effective in commanding attention and getting a response.)


As you finish saying whoa, count “one, and, two” to yourself, and if he hasn’t stopped by then, pick up the reins and, using the least amount of pressure that’s effective, get him stopped. Then back him up a step, then relax and praise him as you let him stand and rest a bit.


Keep in mind that it’s OK to pull on him a little to get him stopped, as long as you always give him a chance to stop before you pull. If you pull at the same time as you say whoa, he’ll never learn to stop just from your voice. (Plus, it can cause him to stop abruptly and in the wrong part of his stride, “dashboarding” you, his driver.)


Also, be sure to give him a long enough break after the stop so that he knows he’s being rewarded. Watch to see that he relaxes (drops his head, exhales) and licks his lips—a sign that he’s “processing” and is OK with this new information he’s just gotten.


Above all, don’t let your horse subtly call the shots on where to stop. In other words, don’t avoid stopping in places where he doesn’t want to (like when you’re loping towards the barn). Also, don’t let him “volunteer” to stop at his preferred spots, such as by the out gate or near other horses. Insist that he do so at the places you’ve chosen.


Otherwise, you’re letting him train you. And that’s never a good idea!


LET US KNOW YOUR THOUGHTS 

Reining Essential 4 – More Advanced Backing

Reining Essential 4 – More Advanced Backing

When I introduced backing, we reviewed how to start a green colt backing from the ground (or an older spoiled horse who needs a “life review”). 

Today, let’s go over how to advance your horse in backing.

While mounted. From his back, use the same rein action you used successfully from the ground. Put just enough tension in the reins to keep him from moving forward, while you gently bump your horse’s sides (both legs simultaneously) with legs in neutral position, increasing pressure (with your legs) as necessary to gain response. Keep enough tension on the reins so he doesn’t push “through” the bit, but no harder. 

Again, ask for just one step at a time. The moment he complies, release all rein and leg pressure and praise him. Gradually ask for more steps, without worrying at this point whether he’s straight.

Remember, a horse learns from the release of pressure, not the application of it. If you make it easy and rewarding to take 1 step, then ask for 2, really soon you’ll have 10, no problem!

Once he’ll move back willingly three or four steps, begin asking for straightness, as well. Because of natural asymmetry, most horses will tend to back with their rear end veering to the right. To prevent this, apply pressure with your right leg a few inches behind neutral position to push his butt back to the left, using your right rein as necessary to help align him. (Eventually, we’ll correct this by moving his shoulders to the right, instead, but that requires more shoulder control than we have at this point.)


In my next article on reining, I’ll troubleshoot the different ways our horses evade backing straight or backing at all! 

LET US KNOW YOUR THOUGHTS 

Reining Essential 4 – Backing (green horse)

Reining Essential 4 – Backing (green horse)

Backing up is important because it’s not only a maneuver in itself but also the correction for a poor stop. 

At this point, however, backing doesn’t mean the same as it will later on (when we’ll want it super-straight, very fast, and in response to few visible cues).

For now, we just want to introduce the concept clearly, calmly, and patiently. The worst thing you can do at this point is to try to go faster and sacrifice correctness and softness.

Because so many of you are working with green horses, I want to go over how I start one backing from the ground.

The goal. Your horse will maintain a soft face (that is, no bracing against the bit) as he takes a few willing steps backward, reasonably straight. 

Here’s how: from the ground. With your horse in a snaffle bit and saddle, stand facing him, just off to one side so you’re not directly in front. Grasp a rein just behind the bit with each hand, and apply gentle backward pressure as you did to ask him to bring his nose back and down in the face-softening exercise. If necessary, slide the bit gently from side to side while maintaining soft pressure on both reins. 

When he responds by dropping his nose down and back, don’t release the pressure as you did for face softening. Instead, maintain a gentle, intermittent pressure and cluck. If he hesitates, be patient. It’s better to wait him out (he’ll give in eventually) than to start applying more and more pressure. Most horses are willing to do this for us if we’re patient and ask for just a step or two at a time in the beginning. If he still won’t step back, apply pressure over his lower face (where the hackamore would rest)to encourage him to unstick his feet.

The moment he takes a single backward step, release all pressure and praise him with hands and voice. Remember, that a horse learns from the release of pressure, not the application of it. Then repeat, over time asking for two backward steps, then three.

At this point, don’t worry about whether he’s perfectly straight as he backs. You’re just looking for willing compliance. (Remember that a key concept of setting your horse up to succeed is by showing him until he understands and accepts, and only then training him how you want him to do it—in this case, to back up straight–and only then asking for speed. It’s especially important here.)

LET US KNOW YOUR THOUGHTS 

Troubleshooting the Counter Arc Circle – Reining  Essential #3

Troubleshooting the Counter Arc Circle – Reining Essential #3

In this article on reining, I’ll be addressing troubleshooting problems with Reining Essential 3, the counter arc circle and how to deal with them.


Troubleshooting the counter arc circle: Your horse’s response will be affected by his natural asymmetry (his stiff and hollow sides), as well as by whatever magnets are drawing his attention at any moment. As when riding a regular circle, use the key-in-ignition movement to correct a collapsing circle with your inside leg at the cinch, and your outside leg at or behind the neutral position, as need be to adjust the position of his hindquarters.

Be sure to keep your counter arc circle symmetric and round. If it becomes like a cigar in shape, know that your horse has a strong magnet probably on the part of the cigar that’s furthest from the barn/gate drawing him back to it. And, when you’re closest to the barn/gate, it’s probably hard to move him smoothly on the circle, away from the barn. The challenge is to smooth and round the circle out.

The parts of your horse that aren’t working correctly are his shoulders and his hip. The hip is usually worse and isn’t moving off your outside leg. So, when you go from circular to cigar, slow it all down and make his hip move off your leg in an exaggerated side-pass to over-correct. Then, move back onto your circle track. You’ll know you are losing control if you find you’re cranking his head too much to the outside. It’s our natural reaction to counteract them not moving off our leg, so just a little bend of his head and neck to the outside, accompanied by an aggressive outside leg.

Be patient and keep working on symmetrical circles and counter arc circles, and you’ll be surprised at how much control you’ll gain over all of your horse’s body whole body and mind!

LET US KNOW YOUR THOUGHTS 

Essential #3: Counter Arc Circle

Essential #3: Counter Arc Circle

I’m going to continue with what I consider to be reining essentials. In this article, I’ll cover #3 – Walking a counter arc circle.

For this exercise, your horse will move in a circle, but with his nose tipped to the outside. His front legs, meanwhile, will be crossing over each other and making a slightly larger circle than his hind legs—sort of like side-passing in a circle (see below). It’s challenging but definitely worth the time and effort to master, as it will help you start to gain control of your horse’s shoulders and ribs. This, in turn, will give you the ammunition you’ll need later, to correct a spin when your horse’s shoulders quit driving. 

This exercise also refines your control over your horse’s head, neck, and shoulders, plus increases your overall awareness of how your rein and leg cues influence your horse’s body. Your circle should be perfectly round, except instead of the hind feet following directly in the tracks of the front, the front feet will be on a slightly larger circle than the hind. Because it involves lateral as well as forward movement, your horse’s front legs should be slightly, but evenly crossing over each other.

Your horse should also stay soft in your hand, his shoulders driving with cadence.

I’ll describe a counter-arc circle to the left (to do one to the right, simply reverse all cues). Walk your horse forward, using both your legs in neutral position to move him in an energetic rhythm. Apply light pressure to your right rein to tip your horse’s nose to the outside (so that you can just see the corner of his right eye). At the same time, open your left rein slightly away from your horse’s neck, to indicate leftward movement, and apply clear pressure with your right leg in neutral position or between your cinches. Remember—you want his hindquarters to be on a slightly smaller circle than his forehand.
    
If your horse doesn’t respond, use your cues more actively. Once he begins to respond, continue to cue him rhythmically to encourage him to move smoothly and with cadence around the circle. Keep a feeling contact with the right rein to keep his jaw soft and his nose tipped to the outside.
     
TIP: This is a challenging exercise. Before you attempt to ride it, try it on foot, without your horse. Draw a 20-foot-diameter circle in the dirt, then move yourself laterally around it, tipping your head to the outside and imagining that your legs are your horse’s front legs as they step laterally over each other. Think and feel how you’ll need to influence your horse’s body with your hands and legs to accomplish the same circle mounted. 
    
When you do attempt it mounted, give your horse (and yourself) time to figure it out. Be patient and pay close attention to how your cues influence your horse, and you’ll find your “feel” in the saddle increasing dramatically.

LET US KNOW YOUR THOUGHTS